Showing posts with label Homemaking. Show all posts

Wednesday, July 16, 2008

Summer Fun - Part 2

Here's another post relevant for the summer daze.

Friday, July 06, 2007

Summer Days At A Glance

Summers are always difficult for me because I'm a routine gal. As much as I want to be a fly-by-the-seat-of-my-pants-person...I'm just not.

A friend once told me that people who are naturally organized don't need charts and schedules and routines written down and posted all over the place, but that those who are naturally chaotic need things written down and planned in order to get anything done. This made sense to me.

People always think I'm organized because they see my with a planner, with a chore chart, and with a routine for my days with kiddos at home. SHHHHHH....don't tell anybody - I'm one of the most random and chaotic people you will ever meet. Here's how I keep things under control though - I plan. I plan myself silly. I have a plan for everything. I plan so much that I struggle to stop planning and get to doing.

Truth be told, I'm a perfectionist and perfectionist don't like to fail. If I stop planning and actually start doing, I open myself up to failing miserably. At least, if all I do is plan than I can succeed at just that...planning :)

Ok...enough self analysis. Here's what I do: I take my schedule from the school year and tweak it to allow for more T-I-M-E. Time for what you ask? Well, time to just be. One of the lost arts these days is knowing how to exist without something to do. It's a skill to be still and master the art of quietness. Plus....boredom is the mother of invention. Kids have wonderful imaginations. They just sometimes don't know it until they are bored :)

The other thing I make sure to allow is plenty of time for taking care of our home. Summer is where I do the bulk of my training because life is slower and I can take all the time I want to make sure that the clothes are folded the right way or that the bathroom clean is done as expected. I try my best not to be "Mommy-dearest" but I do have high standards. I can't help it. I'm a perfectionist. I figure my kids will have something about me to discuss in counseling anyway.

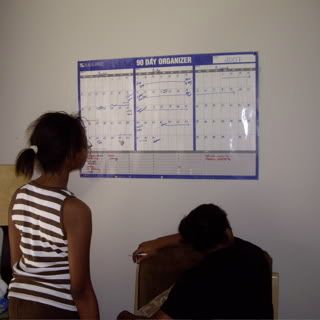
I also put up a summer calender to take care of the "big stuff" - you know - the stuff that the kids really look forward to like family vacation, swimming lessons, summer outings, etc.


I also use the calendar to purposefully plan to do some of the things from our list of Summer Activities. OK...back to the point of this post...our daily summer routine....

AGGGGGGHHHHH... I just got a pop-up message telling me that I'm about to run out of batteries. I'm sitting at Barnes & Noble, getting a little R&R (can you say BY MYSELF) and I can't seem to find an outlet.

So....I will add the daily routine in a subsequent post so that I can at least have a post for today! More to come later...

Wednesday, July 09, 2008

Maxi Pads And Milk

One of the best things about being pregnant is that you don't have to buy maxi pads for awhile.

Seriously.

It's one of the perks from the job of carrying another human being around in your own body for the better part of a year.

I recall towards the end of '07 that I needed some pads and made a trip to the store specifically to that end. I walked to the feminine products aisle, found my favorite brand and then proceeded to walk to the checkout.

It just didn't feel right to be strolling through Walmart with just a soft square bag of female diapers in my hand.

I made my way back to the feminine products aisle and put the pads back...

Yes...I put the pads back.

I waltzed back up to the front of the store, got a basket, and made my way to the back of the grocery store where the diary products are located. I picked up a gallon of milk.

I then criss-crossed the store diagonally and went back to the feminine products aisle that I had visited early, grabbed the bag of pads, threw it in the basket and proceeded to the checkout.

There's just something about going through Lane #11 with a bag of pads that screams...

I'M ON MY CYCLE AND I'M DESPERATE FOR MORE PADS NOW!

At least with the gallon of milk, it might have made it seem as if I was a little less desperate. Maybe I would have needed the pads in a couple of days and just decided to proactively pick them up as I took care of my REAL need of replenishing the milk for my children.

Yea...that's it. It's about my kids....

Somehow, adding the milk to the maxis made me feel a little bit less self-conscious.

SIGH~

I sure am glad that I don't have to worry about that for while. Truth be told I hope not to worry about that for a long while.

There are alternatives to the conventional maxi...but that is for another blog at another time....I don't have to worry about that for yet awhile longer and there is no reason to bare all in one post....

Tuesday, December 11, 2007

WFMW: Cleaning Carpet Stains

With the holidays approaching I figure that there are bound to be a few spills onto my precious carpet, and after last night's poop fiasco, I've learned an invaluable lesson about keeping my carpet clean. Vinegar is my best friend.

If vinegar, a little detergent, and water can get smudged poop out of carpet, anything will.

Here's the technique:

Gather together...

  • Soft Dry Cloth (or many if the stain is one like the one I had to deal with yesterday.
  • White Vinegar
  • non-bleach, non-alkaline mild detergent

Here's what you do...

  1. Apply a small amount of mild liquid detergent to the stain.
  2. Blot the stain with a dry, white cloth.
  3. Flood the area with white vinegar.
  4. Blot again with the cloth.
  5. Apply a little more liquid detergent to the stain.
  6. Blot the stain again.
  7. Flood the area with water.
  8. Blot one last time.
Now, if the stain is stubborn like the one I dealt with, a little elbow grease never hurt anybody.

Here are some additional tips I found online...

  • Always test the cleaning solutions on an inconspicuous part of the carpet before using on a large area.
  • Always use a white cloth rather than a colored one to prevent any dyes from coming off on the carpet.
  • As you blot, keep turning the cloth so that you are using a clean, dry section to pick up the stain and the cleaning fluids from the carpet. Don't rub.
  • If using a brush to help clean the stain, always brush from the outer edges of the spill inward to prevent the stain from spreading.

Just Call Me Poop Mama

So our littlest Kano, is 2yo and going through various stages of, shall we say, "trying things".

The latest is taking off his diaper when we put him to bed. When he first started doing this, we'd go up and check on him right before we retired and find him sitting in the bed, all smiles, with his thumb in his mouth, looking at us like, "I knew you'd come eventually!" We would change his sheets and put him back in the bed.

After a few nights of this, we wised up. We would either put on pajama pants making it not-so-easy for him to accomplish his devilish feat, or, because we cloth diaper a lot of the time, we'd just make sure that we put a cloth diaper cover on with snaps which Kano couldn't undo.

That pretty much had solved the problem.

Well, last night, Daddy put the boys down for bed. He's been in and out of town a bit and said he had admittedly fallen out of the routine. He put the boys down for last night forgetting to do any of the precautionary measures.

We sat down at the kitchen table talking for about two hours (isn't my hubby the greatest for talking to me that long...I can go on and on). During that time, we heard the boys upstairs playing. This is not an abnormal thing. Normally we let them play for a bit and then eventually we go upstairs and give them a final good night.

Just as we ended our discussion, we heard Sumo, who speaks in a quiet controlled tone always because he knows we can hear him on the monitor, say, "Mommy, Kano boo-booed.".

We heard him but continued leisurely wrapping up our conversation. Kano has done this before and we just go upstairs and change his diaper. But something was different this time. Sumo persisted, "Mommy...Mommy....come here.....mommy...MOMMY, KANO BOO-BOOED!"

When Jessie went upstairs, all I heard on the moniter was, "Oh my goodness, oh....MAAAANNN!"

I went and got in the bed and pulled the cover over my head. I change dirty diapers all day. I figured Daddy could handle this one.

After about five minutes, which is plenty of time for a simple diaper change, I started to feel guilty and went upstairs. The smell that greeted me at the foot of the stairs was enough to tell me exactly what had happened.

We are talking, on the sheets, on the blanket, on feet, and in the carpet.....SMUDGED into the carpet.

So while many of you slept peacefully in your beds last night, guess what I was doing. Cleaning up poop. We didn't have any carpet cleaner so I had to get out my natural cleaning book and look for how in the world to clean carpet with the stuff I had around the house. I've been on this whole no chemicals thing, but let me tell you, I wished I had some chemicals last night...some strong ones.

For about 20- 30 minutes around midnight, I was on my hands and knees cleaning and scrubbing. I'll spare you the gory details. All of my efforts occurred at the same time that my boys were having the time of their lives because, to them, they were getting a bath, followed by free, uninhibited, unexpected time to play in the gameroom with their toys.

Believe it or not, the carpet today looks like nothing ever happened. I'll be following up today with a borrowed steam cleaner just to make sure there is nothing less-than-clean left behind. Don't let anybody tell you a little detergent, Borax, and LOTS OF VINEGAR (like a half gallon) can't clean up a stubborn mess.

When I first went up to the room, I had no idea how I was gonna handle that mess. There is no class that I took at college (Go Aggies!) that trained me how to handle this kind of mess. IRS audit, yes...legal business desputes, yes...throwing together a presentation at the last minute, yes... cleaning up poop...totally unprepared. Can I tell you that I wanted to rip up that carpet and promptly go today to get some new flooring? I'm sure my husband wouldn't have fought me too hard on that one. That is one home improvement he would have gladly agreed upon.

But I persevered, I overcame, I did what seemed to be inconceivable, impossible and insurmountable.

Today, I am standing tall and proud...declaring to the world that I conquered poop!

I AM POOP MAMA AND I AM PROUD!


A photo of the perpetrator...

Photo Sharing and Video Hosting at Photobucket

Monday, November 19, 2007

The Terrible Housekeeper

So I've been MIA from my blog for about three weeks. A few days turned into a week that then turned into another week, followed by another. What have I been doing? Well, I'll try to shed a little light on that over the next few days.

One MAJOR thing that I've been doing is simply trying CLEAN MY HOUSE. I've been making a real effort to catch up and get back to a groove of some kind. Let me confess...my house has been a mess. I've been actually fairly embarrassed about the condition of my home especially following a visit from my Daddy. Let me give you a little background.

I'm usually fairly comfortable with the state of my home. Because we homeschool, I don't ever expect my home to look like it came out of magazine. I have gone through a series of adjustments in my expectations over the last few years so that I can stay sane. My philosophy is that "my house should be clean enough to be healthy, but messy enough to be lived in"(quote borrowed from an online acquaintance).

I, along with three kids, are at home at least 4 days a week...all day. Two of those kiddos are under the age of five. My house is not going to stay pristine just because I clean all the time. And I don't want to clean all the time. I strive for balance between being a good mom, teacher, cook, wife, and homemaker. I'll trade a random opportunity to bounce around on the trampoline with my kids than to scrub the baseboards anyday.

So, a few of my comprimises are as follows:
  1. I aim for a clean kitchen twice a day. Three times is a luxury. Even so, I always expect there to be dishes in the sink. (Our dishwasher is on the blink)
  2. I shoot for a mopped floor two times a week, unless otherwise necessary. It's just too depressing to mop the floor only to find in just a few hours that it doesn't like like I did anything.
  3. I try to hit each room in my house once a week on a rotating schedule. What does this mean? My house is not clean all at the same time.
  4. Laundry is always going. I do about a load a day.
  5. My carpet is not every going to look new. No matter how many rules I make about food and drink staying in the kitchen. It just doesn't happen. What can I say? I'm training the littles but they haven't gotten it completely. I'm also trying to train my bigs but...well...
  6. The surfaces in common areas should be neat, but don't have to be empty. My teenager does school at the computer, my littles do school at the table, we congregate at the island...in short we are all over the place. As we transition to the dinner hour, I shoot for things in their place. If I can't have that then I shoot for neat piles.
  7. Oh...and the baseboards. I get to 'em when I get to 'em.
Now here's my problem. These are rules I'm comfortable with. When I have a visitor, I'm completely thrown into a panic. Why? I don't want to leave a bad impression of the kind of housekeeper I am. I'm already weird because I homeschool my children. I don't want to be weirder because I'm home and my home is out of order.

So imagine my dismay when my Dad showed up to visit and proceeded to inspect my house. I kid you not when I tell you that he went from room to room, each time saying, "Oh, Chrystal!" in a loud display of disbelief. Now, granted, the day he came was a bad day. It was right before lunch and I hadn't even had a chance to straighten up before he arrived. In fact, it was a Monday. Mondays are always the worst. He commented on the spots in the carpet, the dishes in the sink, the stuff on my countertops, the baskets of unfolded clothes in the hallway, and then he even peeked in my bedroom and saw the confusion in there. He peeked his head into my refrigerator and groaned at the sticky stuff on the top shelf.

I found myself following him around the house, explaining, explaining, and explaining some more.

It's a terrible feeling to think that you are giving something your all and that it is still not enough. But then again, most mothers and definitely homeschooling mothers, have felt this way at one time or another.

So, how does it end? Well, my Dad sent a housekeeper, his own cleaning service, over to my house to give it a once over. He also told me to get my carpets cleaned at his expense.

Now, I have a lot of pride. I hate the idea that I can't do it all. I hate accepting help and I hate the thought that someone thinks I'm not doing a good job. Truth is though, that little boost was needed and appreciated. It saved me hours (probably days) of work and gave me an opportunity to focus on things that needed my personal attention.

I had time, time to catch up on balancing my bank accounts, time to plan ahead for school, and time to take a nap! Instead of doing dishes, I was able to make some much needed phone calls to insurance companies and doctors. I got a chance to scrub that graffiti on the side of my house (more on that later). I had lots of time to thoroughly finish planning for my daughter's Sweet 16. Those are things a cleaning service can't do but that I COULD.

This little boost and injection of more available time in my schedule got me going. I was on a roll. I just started barreling through my list and got caught up in getting things DONE! Crossing things off of my list is one the best feelings in the world! The feeling of completing something quickly superceded my need to blog!

I do know a handful of ladies who are good housekeepers....GREAT in fact. I have spent many a puzzled day, trying to figure out with my husband HOW THEY DO IT?!?! Here's what I've learned. We all have 24 hours in a day. If someone else's home is always pristine it has to do with how they spent her time. My friend with the beautiful home and four homeschooled children has children all over the age of 12. She is running around to basketball and soccer practice, but she also has lots of help. Another friend with a gorgeous home, has children that spend three days a week at a mother's day out. My friend who makes gourmet meals has her kids in school all day.

I also have a friend whose home is always in disarray but she enjoys her children and plays with them quite a bit more than I play with mine :) They are always outside playing, or inside working on some neat craft. She has the most creative kids!

It's all about what is important and how we choose to recognize that importance with our time.

I choose to live somewhere in the middle right now. That's what I am...a "mom in the middle". I have a teenager, a preteen, a preschool, and a toddler. That is a stretch that will kill you if you let it. I keep my littles going in the morning, only to put them down for a nap in the afternoon and then start working on Algebra 2 with my teenager. If I try and put my housework first at all costs, something else that is important would suffer. So I just do my best.

THAT'S ALL ANY OF US CAN DO...DO YOUR BEST!

We are all a work in progress. So Moms...(and I'm talking to myself too)...

STOP FEELING GUILTY!

  • Do the best you can. Keep your eyes on the Lord and take care of your home and your family for His Glory. He will guide and direct you and let you know how to get done what is important to Him, when it is important to Him.
  • Cut out the things that you can live without that cut into the time you have for more important things (TV, phone, unnecesary computer time...OUCH)
  • Pray! Pray about how God would have you to keep your home. He says that we should be anxious for NOTHING. He also says that He freely gives wisdom...So ask!
Remember Mary & Martha? It is so easy for us as women to focus on the doing and not on the most important thing. Cooking is important, cleaning is important, but don't let it be a stumbling block that keeps you from what focusing on what matters for eternity.

...and PRAY about how God would have you to keep your home. The Word says that,

Philippians 4:6 (NIV)

Do not be anxious about anything, but in everything, by prayer and petition, with thanksgiving, present your requests to God


The Word also says that,

James 1:5 (NASB)

But if any of you lacks wisdom, let him ask of God, who gives to all generously and without reproach, and it will be given to him.

So ask for his help and guidance! He's God and He orders the universe. I'm sure that he can help you order your home!

And thanks Daddy for the help...and I'll try to be a better housekeeper. But just know that the carpet won't look pristine for too much longer. Somebody is bound to spill something soon!

Thursday, October 11, 2007

More on Kids & Common Illnesses

After my last post on homemade cough syrup, I jumped back on Natural Family Online and found this article:

Don’t Fall for These Myths About Common Wintertime Illnesses
By Christine Climer

Many parents dread wintertime because of the illnesses that tend to be more common during the cold season. We are barraged at every turn by misinformation in the media, fueling our anxieties.

An objective look at some of this season’s claims shows much less to worry about than many health reports in the news might lead you to believe. Don’t fall prey to these common myths about common wintertime illnesses.

High fevers cause brain damage and seizures.
False! A fever cannot cause brain damage unless it climbs over about 107ยบ Fahrenheit. Fever can create febrile seizures. These are caused by how fast your child’s body temperature rises, not by how high the temperature goes.

Fever helps our immune systems get rid of infection, so in most cases, it is best not to interfere. Your child’s behavior is the best indicator of how severe his illness is -- not the number on the thermometer.

Fever increases the amount of fluid your child needs, so keep him well hydrated. (See Karen Prior’s suggestions for increasing fluid intake in our Ask the Experts section) Your child’s appetite may be limited during fever, but resist the urge to offer sugary treats to tempt him to eat. Focus on fluids, and offer small portions of nutritious foods frequently.

Kids generally feel bad when they run fever, so listen to those little bodies. Keep them in bed or another quiet, restful place until the fever is gone. Low stress is key to a healthy immune system. Avoid alcohol rubs, unnecessary baths or other activities that might cause the shivers.

Nutrients such as vitamin A, vitamin C, selenium and zinc are known to support the body’s immune function. You might choose an appropriate multivitamin and mineral supplement, or simple add these nutrients to your diet. Include plenty of orange and green produce, whole grains and nuts, dairy products or meats.

Herbalists often recommend herbs that have historically been used for fever, including catnip, yarrow and feverfew. Just remember that herbs are medicine too. Take care to follow the instructions printed on the label or given by your health care provider.

Ear infections always require antibiotics.
False! Viruses can cause ear infections as often as bacteria – and antibiotics do not work against viruses. In fact, many of the bacteria that commonly cause ear infections have learned how to survive antibiotics, so many medications do not work against bacteria anymore either.

Because the body can fight most ear infections all by itself, many doctors choose a “watchful waiting” approach. This approach prevents antibiotic resistance from worsening. The doctor simply waits it out a few days, then checks to see if the situation is improving or if it has resolved without any treatment.

A couple of drops of olive oil warmed to body temperature and dropped into the ear canal helps equalize pressure in the ear and eases pain. Herbalists may recommend adding mullein or garlic to the oil, straining before use. Applying warm or cold packs (depending on your child’s preference) or massaging gently around the ear can also be helpful. Lying down increases pain and pressure within the middle ear, so try to keep your child as upright as possible.

A few more strategies: Some parents find that a visit to a pediatric chiropractor can help ear infections. Babies who are still nursing or bottle-feeding may prefer to eat smaller amounts at more frequent intervals. And finally, research has recently shown that people who consume probiotic bacteria (lactobacilli and bifidobacteria) in their diets are less likely to get ear infections.

Cold medicines, antibiotics and humidification relieve congestion and coughs. There are times when this statement may be either true or false.

A cough isn’t just a nuisance; it is an important reflex that keeps irritants and germs from getting into the lungs. While a cough may seem bothersome, it can keep mucus drainage from getting down into the tiny places in the lungs where it can contribute to worsening infection and interfere with your child’s ability to get enough oxygen.

Most respiratory infections in children are viral, so unless your laboratory results indicate otherwise, do not pressure your doctor for antibiotics. It’s also important to recognize that discharge from runny noses may change color. Yellow-green mucus is actually part of the normal course of an illness and does not necessarily mean that your child has a sinus infection, unless it persists longer than two weeks.

If irritation and inflammation create a dry cough that interferes with sleep, sometimes a cough suppressant can be helpful at bedtime. If your child has a wet cough because of mucus, however, cough suppressants are undesirable. Antihistamines are commonly given to dry up mucus. If your child has a lot of mucus production caused by allergies, antihistamines can sometimes offer some relief -- but they just aren’t effective with colds. They thicken the mucus, making it harder for your child to clear it out of the airway.

Both cough suppressants and antihistamines make kids drowsy, which can be more of a nuisance during the day than the cough or congestion themselves. Decongestants can offer comfort if your child is so congested that he cannot eat or sleep, but these medications are notorious for hyper-activating children -- so bedtime may be a challenge.

Breathing humidified air can soothe airways and help expel mucus, but be cautious about running a vaporizer or humidifier in your child’s bedroom and never run them constantly. Not only can the equipment harbor germs, but the high humidity they create contributes to the growth of molds and dust mites. If your child is sensitive to these, her symptoms may actually worsen. A safer approach is to run humidifiers and vaporizers intermittently, or steam up the bathroom by running a hot shower and take your child into the bathroom to breathe the air for 10 to 15 minutes.

If your child has a barking cough, try taking him outside to breathe cool air for about 10 to 15 minutes. Saline nasal irrigation also relieves congestion. You can make your own nose spray at home.

Saline
1 teaspoon canning and pickling salt
½ teaspoon baking soda
2 cups purified water

Bring water to a boil; add dry ingredients and dissolve.Cool to room temperature. Store covered for up to 48 hours.

Instill a few drops into each nostril and then suction with a bulb syringe, which can often be found on the ear care or baby care aisles of your pharmacy.

Drinking plenty of fluids is the most important thing to help clear mucus and keep mucous membranes moist. Warm teas and broths make soothing choices. As mentioned above, plenty of immune-supporting nutrients are vital to healing. Vitamin C is also an antihistamine, so make sure your children get plenty, especially if they have allergies.

People who consume probiotics are less likely to experience either respiratory infections or allergies. A gentle upper body massage after a warm bath helps children relax, soothes soreness and increases circulation. Sleeping with the head elevated is helpful.

Your herbalist may recommend herbs that have been historically used to soothe irritated mucus membranes, expel mucus, clear infection and open airways. These may include things like mint, eucalyptus, horehound, thyme, mullein, evening primrose and echinacea.

Children with allergies are more susceptible to respiratory infections. Keep environmental allergens low by vacuuming and dusting frequently, changing air filters monthly, using allergen barriers on beds and pillows, washing bedding weekly in hot water and maintaining humidity below 50 percent.

When should you be concerned?

Seek medical care immediately if your child:

• has a seizure lasting longer than five minutes or a seizure for the first time
• runs any fever at all and is under 2 months old
• has a temperature of at least 101ยบ and is 2 to 4 months old
• has a temperature over 105ยบ
• does not stop crying, seems confused or is unable to wake up
• seems to have a stiff neck when the head is bent towards the tummy
• has a blood-red or purple rash
• is having difficulty breathing (gasping for air, flesh between ribs sucks in when the child inhales, flaring nostrils) or takes more than 60 breaths per minute
• has unusual drooling (i.e., not related to teething)
• is coughing up blood or has bloody stools
• has blue- or gray-colored lips
• has signs of dehydration (dry mouth, no tears, no urine in the past eight hours)
• is under 12 months old, has diarrhea and has vomited three or more times in 24 hours
• has diarrhea more than eight times in the past eight hours

Call your health care provider during office hours if your child:

• is under 2 year old and has a temperature over 104ยบ
• complains of burning with urination
• has been running fever for more than 72 hours
• seemed to be getting better but then started getting worse
• had a fever that went away for at least 24 hours, then returned
• is under 3 months old and has had a cough for more than three days
• has had diarrhea or a cough for more than two weeks
• has been vomiting for more than 24 hours
• has had a green/yellow runny nose for more than two weeks

© Christine Climer


Christine Climer is a registered nurse with experience in pulmonary disease, pediatrics, home health and hospice services. Also trained in early childhood education, she is currently executive director and child care nurse for an early childhood health promotion organization. She lives with her husband and three children (including a set of twins) in Texas and enjoys researching health issues and gardening.


So I think for now, I'm just gonna keep feeding the boys good foods (steering clear of dairy to avoid more mucus), including our regular supplements, and let their bodies do the job its trying to do. We are due for our yearly peds visit next week anyway, so we'll see how they make out.

Homemade Cough Syrup

Little by little, I'm flying the coop, I know :)! We've had the "sickos" around here and, although I'm not sure if we are fighting allergies or colds, we have been fighting nagging coughs, and more recently, runny noses and congestion.

I'd heard that there were lots of homemade tonics that did a good job if not a better job of some conventional alternatives. So...I googled...and found this from Natural Family Online:

Thyme-Honey Syrup

Thyme is an excellent expectorant as well as an anti-microbial herb, and honey not only soothes but acts as a preservative as well. I keep this wonderful-tasting syrup in my refrigerator all winter long. It can be used for colds, coughs, laryngitis and sore throats.
• Steep 1 ounce of dried thyme leaf (Thymus vulgaris) in 1 cup boiled water, covered, until cool.
• Strain; mix the liquid with 1 cup of honey.
• Store refrigerated in a glass jar. It keeps well for several months.
• Give undiluted doses of 1 teaspoon to 1 tablespoon several times a day as needed.


We tried it and it was great. Sumo's cough had been labored and unproductive. After taking a few teaspoons throughout the day and sleeping with a vaporizer, things were loosened up and moving along much better. By the next day, there was no coughing at all. Also, we did use local, raw, unfiltered honey. I've read that this is the best kind to get.

In general we have a few supplements/habits that we use to keep our immune systems in tip-top shape. We'll continue with those while I go off now to find something to try for some of our other nagging symptoms.

Wednesday, October 10, 2007

WFMW: Easy Clean Bathrooms

Cleaning my house is one of the HARDEST things for me to make happen. Because I'm with my children all the time and because two of them are under age 5, I have to be creative to fit cleaning in.

I'm pretty good about keeping common areas (Living Room/Game Room) straightened and cleaned. Also, my kitchen is a must. I spend too much time in there for it to be out of control.

I struggle most with my room and my bathroom. Why? Well, let's see. When I get up in the morning, I shower, get dressed, and then leave....never to return again (or at least it seems that way). My dh rises after me, so I don't have the luxury of getting out of my bed and then turning around to make it.

My biggest struggle though is my bathroom. I LOVE clean bathrooms, I just seems like I haven't ever been able to keep my clean consistently....Until recently!...

First of all, I've adopted the Flylady concept of wiping down my sink and my mirror before I leave the bathroom in the morning. It takes all of 30 - 60 seconds. I just finish my morning routine, spray some Windex on the mirror and then wipe it down (old newspapers work wonderfully). Then, I take a rag wipe down the counter top, using cleaner when it needs it.

But what about the rest of the bathroom you say? Well, here's where it gets good. When I put my children in the bathtub, what I've usually done is sit there and watch them play. Now...I get busy! Even if all I can get to is one item in my bathroom, I have 5 minutes (or maybe 10 if I need it) to completely get some area of the bathroom clean. Five minutes is all I need to clean the toilet, mop the floor, scrub the bottom of the shower, clean the shower glass, or vaccuum (yes part of my bathroom is carpeted :(

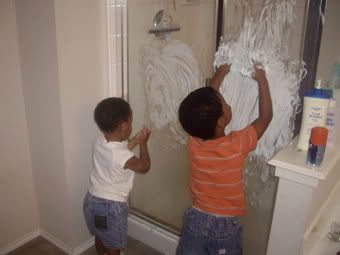
One other things that I've recently discovered. There are times when I have to do some cleaning with my boys in tow. I let them "clean" with me. By giving them something to do, I create more time to do what I need to do. The other day, I put shaving scream on my shower doors. They enjoyed playing with it and spreading it around and I enjoyed about 20 minutes of cleaning time! 15 minutes they played in the shaving cream and then 5 minutes they cleaned up their mess (with me helping of course)!


Be sure to check out Rocks in My Dryer for more Works-for-Me Wednesday tips.

Saturday, October 06, 2007

Our Breakfast Rotation

I was asked to share our breakfast rotation when I asked for lunch ideas. Let me say first of all that my rotation is BORING, but it keeps life simple and easy in the mornings when we are all finding our way. That said, here it is:

Mondays - Cold Cereal (Raisin Bran, Granola)
Tuesdays - Smoothies (mostly strawberry banana) and Muffins (all different kinds)
Wednesdays - Eggs (Scrambled, or boiled) with Toast
Thursdays - Oatmeal
Fridays - Pancakes or Waffles with yogurt. (thanks to Gracie)
Saturdays - Smoothies (again) or Yogurt and then we sometimes make a donut run.
Sundays - Hodge Podge. I've made biscuits and eggs, served fruit and toast, yogurt, or even made oatmeal again.

Yes...we do eat fruit almost every morning and, Yes...this menu is the same EVERY WEEK. We are all used to it and it means that we can move on to more interesting things. I'd love to hear your other ideas.

Wednesday, October 03, 2007

WFMW: Favorite Kid Lunches

I would really like to make a rotating schedule for lunches. I've got breakfasts down to a science and dinner doesn't seem so hard, but ,well, lunches....that's another story.

I'd like to get as many ideas written down as I can think of, put them in an order that makes sense (so that we don't have only sandwiches everyday for a week) and then just go through them so I don't have to think about it!

PLEASE give me your lunch ideas that your kids love and that aren't too hard to fix. I'm not gonna be too picky...my kiddos will eat almost anything. Just give me what works well at your house!

Thanks in advance!

Check out some of my other recent Works-For-Me-Wednesday ideas:
Or simply click HERE to see view all of them!...

Be sure to check out Rocks in My Dryer for more Works-for-Me Wednesday tips.

Tuesday, September 18, 2007

A Good Description...

This is just so good...I can completely relate. From XBOX WIFE. This is Mrs Brownstone's description:

Between being a housekeeper, a cook, a chauffeur, a washer woman, a tailor, a nanny, a teacher, a tutor, a secretary, a gopher, a banker, a nurse, a wife, a lover, a mother, a daughter, a sister, a granddaughter, a daughter-in-law, a sister-in-law, an aunt, a friend, a provider, a volunteer, a church helper, a prayer warrior, a cheerleader, a psychologist, an organizer, and a social activities director...I don't have time for a paying job!

Tuesday, July 24, 2007

Another Late Night...

It's dark thirty and I'm still up...trying to get it together to get out of dodge. I knew that motherhood wasn't for the faint of heart but GOLLY!

We are really watching our food budget and so my normal mode of operating would have had me at Walmart in the frozen food section picking up a bunch of convenience, "nuke-ready" foods...but as luck the Lord would have it, my heart has blossomed into that of a mother who actually cares desires to see her children eat well in her absence. Also, eating foods prepared by Mom costs less :)

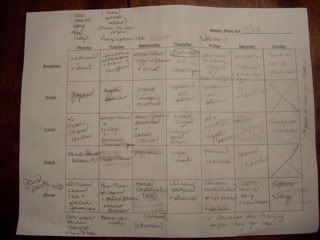
So last night, I planned out a menu for the next week and a half. I tried to use as much stuff as possible that was already in my pantry so I wouldn't spend unnecessarily. Then I tried to order my meals where I could "bulk cook" and use the resulting food for multiple recipes. Anyway, I left my house for the Walmart 3 minutes down the street at 11pm (I got home at 12:30am...crazy I know). I spent right at $120 for groceries and that included meat (actually 3 chickens on sale and some lunch meat), paper towels, paper plates/cups, and diapers. It also included a large package of frozen corndogs, instant oatmeal, a frozen lasagna, and a couple of other "snacky" items for backup food when Antie or Granny need something quick. I was very proud of myself!. Here's a picture of one of my menu pages...


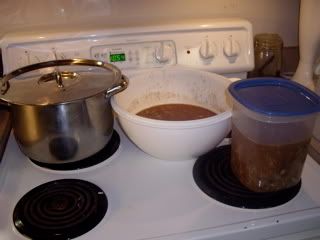
So here's what I've been working on today.


That's pinto beans soaking in the silver pot. We'll have beans and cornbread for lunch tomorrow and the next day this will become bean burritos for dinner. Chicken Tortilla soup is what's in both the white plastic and clear plastic bowl. Both were cooling but the clear goes into the fridge for the kids to eat in a couple of days and the other will be poured into a plastic storage bag then put into the freezer to help me out when I get back home and don't feel like cooking.

Bessie, my 11 year old, loves to chop and dice and decided to lend a hand. I taught her how to clean a chicken, season, and decorate it for the crockpot.


This bird will help me make chicken enchiladas and a chicken pot pie to put away for my family (and no...I'm not going to make the crust from scratch).

I tell ya...I feel like Proverbs 31 material TONIGHT! Well...I would have felt even better if I had gotten around to making bread for my kids before I left but my husband told me to quit while I was ahead reserve my energy and just pick up a couple of loaves from the store (I hate when I get backed into a corner and have to do this...makes me feel like a failure...can you tell I'm a perfectionist?)

Oh, by the way, I closely follow the recipes linked above...but...I get a little creative at the end making them like I want them to taste. The tortilla soup gets a couple of cans of black beans not called for in the original recipe as well as a tablespoon of cumin versus a teaspoon. I didn't have Cilantro, and I didn't use green chiles or enchilada sauce because of spicyness. I add a can of tomato sauce instead. Confusing enough? Awww come'on...I'm trying to let my inner chef out :)

So I'm off to catch a wink of sleep before I wake up and keep on chugging along. I figure I can go comatose once I get on the plane ...

Friday, July 20, 2007

Simple Bread Baking By Hand...

I posted a SUPER LONG post a little ways back about my bread baking. In retrospect, it was overwhelming to say the least. Although there are a lot of super great tips, I neglected to make sure I left instructions for those of us who might be just getting started with making bread by hand. The following is a condensed reprint of Marilyn Moll's Bread Recipe from Urban Homemaker. Marilyn's website is WEALTH of information. Be sure to check her out!

Don't worry about the special stuff this recipe calls for if you don't have it. Regular yeast from the store will suffice to get started and so will Vital Wheat Gluten if you don't have Dough Enhancer. The longer you bake bread the fancier you can get! Just get started. If this recipe seems to be too much just get any old recipe and start somewhere! You'll love your own homemade bread!

Hand Method: (yields 2 loaves)

1/3 C honey
1/3 C oil
2 1/2 C Warm Water
1 1/2 TB Saf Instant Yeast
2 1/2 tsp Real Salt
6-7 C Fresh whole wheat flour
1 1/2 TB Dough Enhancer


Combine the warm water, yeast, and 2 Cups of fresh whole wheat flour in a large mixing bowl. Allow to sponge for 15 minutes. Add the honey, oil, dough enhancer, salt and 4-5 C additional flour until the dough begins to clean the sides of the mixing bowl. Do not allow the dough to get too stiff (too dry). Dough should be smooth and elastic. It is a common mistake for the beginning bakers to add too much flour.

Knead the bread by hand 7-10 minutes or until it is very smooth, elastic, and small bubbles or blisters appear beneath the surface of the dough. Six to ten minutes of kneading by electric mixer should be sufficient to develop the gluten if you are using fresh flour. If you are kneading by hand, be sure to add the minimum amount of flour to keep the dough soft and pliable by using a tsp of oil on your hands and kneading surface.

Form the dough into 2 loaves if using the hand method. Place the dough into greased loaf pans. Allow to rise in a slightly warmed oven or other warm place until doubled in size (about 30-60 minutes).

Bake loaves for 25-30 minutes in a 350 degree oven. Bread is cooked through when it sounds hollow when tapped on the bottom, and when the top and sides are a golden brown color.

Wednesday, July 18, 2007

My Gardening Experience...

No one in my family is a farmer, gardener, or even really from the country. I have absolutely no experience and have no idea what I'm doing. That said....what I can say is that I tried. I am asked many times why in the world would I try my hand at growing my own veggies. The answer? I really don't know other than the fact that I one day decided that I didn't know how and that I felt I should at least know. So, I went to my local organic gardening place and asked a bunch of questions until I felt confident enough to try.

I got a late start and so I realize that I'm not gonna get high yield or anything (the Texas heat is just too much for a blooming tomato plant to take), but I am proud of myself for making the effort and I've realized exactly how rewarding gardening can be. I can see how gardening can be addicting. Problem is, I don't have much more room in my life for addictions. Between food, blogging, and home and family, I'm all tapped out!

Now for those of you who are experienced gardeners. Don't laugh at me. I have to start somewhere :)

Here is what I began with. My plan was to make a whole in the ground big enough for one plant and then add room a little at a time and add one plant at a time. Digging up grass is HARD WORK and this project was done all by my lonesome. Oh well, it the effort all went towards my calorie burn for the day!


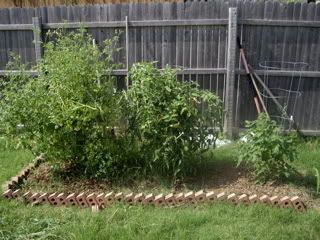
After a few weeks, here's what it looked like. As you can see I lengthened the bed a bit. The tomato cages were free from my local Freecycle and the bricks were leftover from our house building materials. I spent about $20 on compost to add to my existing soil. One day I might get adventurous enough to start my own compost bin.


Here's how things looked last week:


The biggest tomato plant is so large and heavy that I've had to do all kind of weird things to get it to stand upright but it's still hanging in there. Now for the fruit of my labor - it's beginning to show itself! Here are some of my cherry tomatoes (some still green and couple ripe). Me, my boys and my nephews had a blast the other day just popping them all the other red ones off the plant and into our mouths.


My larger plants aren't ripe yet but they are looking good! I can't wait to slice 'em and serve 'em. I've always heard homegrown tomatoes turn out to taste much better then the ones I would normally get...


This is one that the boys picked while we were out the other day. They just got picking happy and picked the wrong plant. So...this one is not gonna make it to the table.


So there you have it folks! I've tried it and had a little success. Maybe next planting season I'll venture into different veggies. I hear bell peppers grow pretty good in the Texas heat...

Thursday, July 12, 2007

Q&A - Daily Schedule & Toys for Tots

Nikki left this comment in response to Summer Days At A Glance:

Wow - I just checked out your schedule (I am also a chronic 'lister' and planner, and always curious about what works for others...). You get up at 4AM?!! Are you serious? And don't go to bed until 11pm? I would love to manage that - do you feel ok energywise?? Wow....

OK Nikki, you got me! That has actually happened like...twice. Let me tell you what actually happens. I stay up until midnight of 1am and get up at 5am or 6am. Realistically this can only work for about 3 or 4 days and then I go to bed early or take a nap. I'm working on consistency in this area. Consistency for me in anything is a real struggle and serves as an area of reflection for me as I think about getting older. I'm having to learn to live my life like a marathoner and not a sprinter.

The problem is that I can get so much DONE at night when the house is quiet. I have LONG stretches of time to complete tasks from my To Do List and that frankly is addicting :)

I'm almost done with our working schedule for the summer. It's more realistic. The schedule you looked at was just super-Type-A-little-me taking my first crack at making a family schedule and I was a bit zealous. I can proudly say that the meat of the day (like from breakfast on) was fairly realistic. Also remember, my schedule serves as merely a GUIDE for my day, not a blueprint. I reserve the right change this up at any moment. Hope that helps!


Holly left this comment in response to this WFMW post:


Isn't it bad for the people who have to buy your "used" toy? I could see if your buying them, but to play with and mess around with a brand new item for 45 minutes, only to put it back on the shelf seems selfish and rude to others, doesn't it? I know I hate to want a certain item, and there is only one on the shelf, and it's obviously been tampered with/chewed on/dead battery or what have you, it ticks me off. Would you appreciate that? Not trying to be rude, but think about it for a sec....

Well Holly,

You have a point! I have to admit that your comment gave me pause. I took a day to think about your note and have come to the following conclusion. I don't think it's a big deal. I figure if I was completely inconsiderate, your point would be well taken. If I let a drooling toddler knaw for 45 minutes on a toy that somebody's else kid would receive, then yes. If I let my boys, tear the boxes or packaging, then yes. But I think that if a toy has been so packaged by a manufacturing to obviously encourage a child shopping with Mom to WANT to touch and play with it (especially the ones that say "TRY ME") then I don't think that it's a huge catastrophe.

When I buy toys from the store, I do not expect that it has never been touched by another. I'm not surprised when the batteries run out faster. I'm pretty positive that the toy manufacturers don't put batteries in those toys that were designed to last anyway.

If I carried this mentality further, then I should be offended when I go shopping for clothes and other people have tried them on or worse, they have bought them, decided they didn't like them, and brought them back....and Lord have mercy when we buy shoes or worse end up with shoes somebody else returned! Maybe store should not be able to resell used merchandise?

I'm not offended because it is all a part of buying things from stores that have goods available to all.

Like you I'm sure, I will opt for the box or packaging that looks the most untouched by others. I think most people go for the newest looking item, but I have a choice as to what I decide to take home - so it's not a big deal either way.

Just my 2cts. Thanks for visiting my blog :)

Another comment from Holly...

I think you are a coward for not publishing my comment. I think you know I am right. Whatever.....

Ouch Holly!...I thought you said you weren't trying to be rude! In all sincerity, I read your comment and took time to think about it. I thought it was a question worth considering and responding to. I would have loved to respond to you directly but didn't have a link to your blog or an email address, hence, the response on my blog. The opinion you gave in your comment did give me pause and will probably make me even more conscious about how my kids treat the toys they play with. However, we are all entitled to our opinions and my opinion is as stated above.

Tuesday, July 10, 2007

WFMW: No Fuss Shopping w/Kids

As much as I would love to schedule a regular shopping day or time to go myself minus the kiddos (specifically the littles), my husband's work schedule is sporatic and inconsistent so many times I do take my children with me. Normally all the kiddos will go and my big girls help me with the little ones but at times (like this week b/c my girls are at camp), it's just me and my boys.

Wally World and Target are our favorite places to shop on a regular basis and about a year ago, I figured out a way to make the trip fuss-free.

For either shopping trip, the first section we go to is the toy section...YES...the toy section. Each boy gets a toy that he can play with while we shop. Because these toys are new to them and therefore they are in awe, this can give me at least 30 - 45 minutes of preoccupied kiddo shopping time.

When we go to Super Target it's even easier. We go straight to the food section and order a popcorn/drink combo all for the grand total of $1.08. This holds them for another 30-45 minutes at which point if I need more time, I can then head to the toy section!

Now, I know someone is wondering what in the world I do when it's time to leave the store and the kiddos have to put those toys back. Well, the first time that Sumo (the 4yo) whined about having to leave his toy, I told him the Buzz Lightyear couldn't come home with us because his home was the store and he had to sleep there. When he started to whine a little louder, I bent down and said in his ear, "if you don't stop crying and put Buzz Lightyear down then we won't be able to get a toy the next time we come to the store". This did the trick.

Now lest you think that I always have it that easy, there have been a couple of times where we left the store with a crying child BUT...the next time we came to the store, I followed through and didn't go to the toy section. I actually planned a trip to the store specifically for that purpose....to show him that I meant what I said.

You could always bring a toy from home but I've found that the trip is so much more exciting for the kiddos when they look forward to playing with something they don't have all the time.

The favorite toys for my boys are toys from the movie "Cars" or "Toy Story". Sumo is starting to get into "Diego". Kano (the 2yo) just goes for anything. He tires out much faster than Sumo so I may put a couple of other things under the basket for later.

I have other tricks for shopping too. When we go the health food store, there are no toys there but there is raw honey. I fill up the little container and let each boy dip their finger in (ummm...). I might also go straight to the bananas, take two to the register pay the whopping 40 - 50 cts, and let them eat while I shop. Toys or food, the key is preoccupation :) We rarely buy cereal (at least the sugery kinds) but even a cereal box will hold the attention of a young 'un for while.

It's amazing what this little practice has done for my sons. They have definitely grasped the concept that just because I want it now, doesn't mean I get it now!

Believe it or not, the bribery doesn't last forever, somewhere in there, they learn that Mommy will go the store and they will have to go to and BEHAVE. I do go shopping at times when I either don't feel like toys or don't have time. Children are wonderful, they can learn to do anything. I just tell them, "no, not today...we are not getting toys".

Anywho, it works for me!

Be sure to check out Rocks in My Dryer for more Works-for-Me Wednesday tips.

Friday, July 06, 2007

Summer Days At A Glance

Summers are always difficult for me because I'm a routine gal. As much as I want to be a fly-by-the-seat-of-my-pants-person...I'm just not.

A friend once told me that people who are naturally organized don't need charts and schedules and routines written down and posted all over the place, but that those who are naturally chaotic need things written down and planned in order to get anything done. This made sense to me.

People always think I'm organized because they see my with a planner, with a chore chart, and with a routine for my days with kiddos at home. SHHHHHH....don't tell anybody - I'm one of the most random and chaotic people you will ever meet. Here's how I keep things under control though - I plan. I plan myself silly. I have a plan for everything. I plan so much that I struggle to stop planning and get to doing.

Truth be told, I'm a perfectionist and perfectionist don't like to fail. If I stop planning and actually start doing, I open myself up to failing miserably. At least, if all I do is plan than I can succeed at just that...planning :)

Ok...enough self analysis. Here's what I do: I take my schedule from the school year and tweak it to allow for more T-I-M-E. Time for what you ask? Well, time to just be. One of the lost arts these days is knowing how to exist without something to do. It's a skill to be still and master the art of quietness. Plus....boredom is the mother of invention. Kids have wonderful imaginations. They just sometimes don't know it until they are bored :)

The other thing I make sure to allow is plenty of time for taking care of our home. Summer is where I do the bulk of my training because life is slower and I can take all the time I want to make sure that the clothes are folded the right way or that the bathroom clean is done as expected. I try my best not to be "Mommy-dearest" but I do have high standards. I can't help it. I'm a perfectionist. I figure my kids will have something about me to discuss in counseling anyway.

I also put up a summer calender to take care of the "big stuff" - you know - the stuff that the kids really look forward to like family vacation, swimming lessons, summer outings, etc.


I also use the calendar to purposefully plan to do some of the things from our list of Summer Activities. OK...back to the point of this post...our daily summer routine....

AGGGGGGHHHHH... I just got a pop-up message telling me that I'm about to run out of batteries. I'm sitting at Barnes & Noble, getting a little R&R (can you say BY MYSELF) and I can't seem to find an outlet.

So....I will add the daily routine in a subsequent post so that I can at least have a post for today! More to come later...

Tuesday, June 26, 2007

Baking Bread - RECIPE!!!

If you are considering not bothering to read this post because you don't even know WHY I would want to bake my own bread...read THIS...it explains why homemade wheat bread is so good tastin' and good for you.

This post is EXTREMELY long. It contains the recipe and instructions for the bread that I make at home from scratch. The original recipe is at www.yourhealthsource.org. My recipe for Whole Wheat Bread is tweaked a bit from the original.

Before you even read further, know that I have a posted a simple recipe for baking bread by hand too (yield = 2 loaves). Please don't be discouraged from trying. I'm just an information junkie and want to share as much as I can...

Bread making doesn't have to be difficult. Any 'ol recipe book will give you a good start. When I decided to try making bread I picked up the red-and-white checkered Better Homes and Garden Cookbook and made homemade white bread. It was very good. Then I made wheat bread from the recipe on the back of the whole wheat flour package bought from WalMart. It was tasty too.

I started making bread three years ago and I'm still learning. Life is a journey; so is making bread :)

The first recipe assumes you are milling your own wheat into flour and using a Bosch Universal Mixer. If you don't have the equipment to mill your flour, start with the flour from the store or find someone near you who DOES mill their flour. Further down you will find the recipe for making bread by hand. This bread is GOOD and yield 6 loaves. It's the same bread I use to make cinnamon rolls!

WHOLE WHEAT BREAD

You will be delighted with how simple bread making can become. Bread can be ready to eat in as little as 1 ½ hours!

12 cups wheat berries
2/3 cup olive oil
2/3 cup honey (Sometimes mine ends up being a cup :)
6 cups warm water (120 to 130 degrees)
(I use 5 cups of water and 1 cup of STARTER)
3 tablespoons yeast
2 tablespoon salt

Makes 6 loaves
Preparation time: 30 minutes
Rising and cooking time: 40 minutes

1. Using the mill, grind 12 cups of hard Prairie Gold Montana Wheat (important to have high quality, triple washed, certified chemical free wheat-this is the safest for your mill and is grown for human consumption, with plenty of protein) (12 cups of wheat berries= approximately 18-20 cups of flour)

2. In Bosch™ bowl, use the Dough Hooks to mix the honey, oil, water, and yeast. Be sure the plastic splash guard is on the mixing bowl.

3. While running the mixture at low speed, add 10 cups of flour and then the salt.

4. Stop the machine and set a timer. (10-15 minutes in the winter-10 minutes in the summer) Put the lid on the bowl to capture the moisture and warmth of the mixture. Let sit until timer goes off or until dough rises almost to the top of the bowl. This is called letting the dough "sponge."

5. Turn the machine on 1 and continue adding flour until the dough clears the sides of the bowl.

6. Knead on a low speed for 4 to 5 minutes. Let the dough sit for 1 to 2 minutes, then check for gluten development. (see Tips & Techniques) The dough should stick to itself, not to you.

1. Press the dough and it will spring back.
2. Dough clings to itself and not you.
3. Dough is translucent when stretched, you can see light through it.


7. This is the fun part! Take the dough out of the bowl by dumping it onto an oiled countertop or large cutting board. (no need to add flour from this point forward) Pick the dough up and slam it down a few times. Slamming the dough helps remove any air bubbles that may have formed. Simply dump the dough and then shape it into a large circle. Using regular kitchen scissors, cut the dough (like a pie) into 6 equal pieces. Each of these pieces of dough can now be used to make a variety of bread forms. (use a kitchen scale to weigh the dough if you want 6 perfectly equal parts) Some of the possibilities are: loaf of bread, cinnamon rolls, foccaccia bread, bread sticks, dinner rolls, pretzels, tea rings, hoagie buns, filled breads/buns, sandwich bread, 3 ball dinner rolls, crescents, pizza crust, sticky balls/monkey bread, cinnamon twists, herb/garlic bread, braided breads, etc. See instructions below for shaping the dough.

8. Shape into the desired form and let rise in a warm oven for about 20 minutes or on the counter for 1 hour, OR until the bread doubles in size.

9. Bake at 350 degrees. If your bread is rising in the oven, simply turn on your oven and let it preheat with the bread already inside. You may want to experiment with taking the dough out of the oven and letting the oven get to the full 350 degrees and then put the dough back in. I like to just turn on the oven without removing the dough because it saves me a few steps.

10. Get to know your oven. . .rolls and pizza crust take less time, loaf bread takes up to 30 minutes in some ovens. I usually bake rolls for 15 minutes (or less) and bread for 20 to 25 minutes.

SHAPING THE DOUGH

After forming the dough into the shape of a large circle. Cut the dough into 6 equal pieces. Now you have the beginnings of a variety of bread forms. 1/6 can become any of the following forms, or any you can dream up! Set aside 5 portions of dough and cover with moist cloth.

LOAF OF BREAD, simply take 1/6 of the dough and shape it into a long, narrow loaf and place into a prepared (oiled) bread pan. Pat down any remaining air bubbles.

CINNAMON ROLLS, simply roll dough out into a rectangle shape, (at least 10 by 14 inches) then add your favorite ingredients. If you want extra fluffy cinnamon rolls, experiment with more yeast in your basic recipe. I've used up to 5 tablespoons.

Here's what I do: spritz the entire face of the bread with olive oil, sprinkle with chopped pecans, cinnamon, finely ground coconut and organic raisins. You can try applesauce, chopped bananas, maple syrup, etc. This bread is so good for you, I don't mind a simple sugar frosting. In our household, we drizzle fresh cinnamon rolls with maple syrup and by pass the traditional sugar coating. Roll up the dough and then use scissors or dental floss to cut the dough into traditional cinnamon rolls. Place them ¼ to ½ inches apart in a prepared pan and bake for 15 to 20 minutes.

FOCACCIA BREAD, simply roll dough out into a rectangle shape.(10 by 14 inches) I use a jelly roll stone and spread the dough out with a roller. I let the dough rise and then spritz it with olive oil and follow with Italian herbs or a Rosemary herb blend. We serve Focaccia bread with marinara sauce (spaghetti sauce) and a salad. Very easy and very yummy! This bread is also great dipped in an olive oil/balsamic vinegar/Italian seasoning mixture. Try kneading dried tomato bits, chopped onions & garlic into this dough before you roll it out.

BREAD STICKS/PRETZELS/CINNAMON TWISTS, take 1/6th of the dough and make it into a circle. Cut the circle into 8th and each piece can become a bread stick. Simply use your hands to roll the dough into long pieces. Place the dough on a prepared pan or cookie sheet, spritz with olive oil and your favorite seasonings(for pretzels, dip the pretzel in a large bowl of water and then add coarse salt) and bake for 10 to 15 minutes. You may want to lightly knead spices into the bread and then shape them for bread sticks. Cinnamon Twists are just bread sticks that have been rolled in olive oil or maple syrup and then in a mixture of cinnamon and sugar, then twisted and placed on a prepared baking sheet. Keep in mind, these products will need less cooking time. Probably 12 to 15 minutes.

DINNER ROLLS, again, taking 1/6th of the dough, form the dough into a circle and then cut it into 8ths. Each 8th makes a large dinner roll. Place dinner rolls about ¼ to ½ inch apart in your prepared pan.

THREE BALL DINNER ROLLS, 1/6 divided into 8 equal portions. Each portion is then divided into three equal parts. Roll the parts to form small balls and then place three balls into each muffin space.

PIZZA CRUST, using 1/6th of your dough, spread the dough onto a pizza stone as thin as you like, prick and bake for 15 to 20 minutes. If you like soft crust, let the dough rise and then bake. If you want crispy crust, do not let the dough rise, prick it and then bake immediately.

STICKY BALLS/MONKEY BREAD, Use a round cake pan with 2 to 3 tablespoons of olive oil in the bottom of the pan. Add honey or maple syrup and pecans or walnuts. Sprinkle with cinnamon. Gently knead raisins into the dough and roll dough into 1" balls and fill the pan with the balls touching. Let it rise and then bake. Turn pan upside down on a platter to serve. Variation: roll each dough ball in a maple syrup mixture and then roll the wet dough in a mixture of cinnamon, finely ground coconut, raisins, and nuts and then place in the pan, prepared with olive oil and syrup as previously instructed. Cooking time may be longer depending on the amount of moist ingredients.

BRAIDED BREADS, these are so fun and beautiful. Divide 1/6 of the dough into three equal pieces. Roll the pieces into long strands and braid your bread. Or, divide the 1/6 of dough into two equal parts, roll the pieces out, into a 4 by 12 inch rectangles. Place spices, veggies and marinara sauce down the middle of each strip. Fold each strip in half and seal the edge. Now you have two long, sealed, stuffed breads. Twist the strands together and you now have a beautiful stuffed bread. Try sweet ingredients, too. Cinnamon, pumpkin, raisins, nuts, dried cranberries, etc.

BURGER BUNS, Divide 1/6 of your dough into 4 equal parts. Shape into the form of traditional burgers. Rise, bake, cool and cut in half. Press sesame seeds on top if you like.

Use your imagination! Go to your local library for illustrated bread books!

RISING THE DOUGH
Cover and let rise until double in a warm draft-free place. This should take anywhere from 20-40 minutes. Or, preheat your oven, turn it off and place loaves in the warm oven.

If desired, brush olive oil on your loaves for a brown crust. Sprinkle with oat, rye, or whole grain flakes. Sesame or poppy seeds work well too. This makes a beautiful presentation and the flakes or seeds add a delicious 'toasted' flavor to the bread.

RISEN DOUGH READY TO BAKE
Bake at 350 degrees. Rolls, 20-25 minutes. Loaf bread, 25-35 minutes. Many ovens vary on temperature, if you are not sure, buy an oven thermometer to check your oven's exact temperature. Another surefire way to tell if your bread is done is to stick it with an instant-read thermometer. It should read 200 degrees.

Fresh from the oven, your bread is ready to eat. The whole process takes approximately 1 ½ hours!

Almost every time I make my bread, I freeze dinner rolls prior to rising. I simply shape the rolls and place them on an ovensafe dinner plate and put them in the freezer. When I am ready for fresh from the oven bread, I take the plate out of the freezer, let the rolls thaw and rise and then bake them. Delicious and very convenient. If you need the dough to thaw quickly, preheat your oven, turn it off and then put the dough in the oven to warm and rise.

When we are hungry for pizza, we will thaw the same dinner rolls, roll them into individual round pizza crusts, bake them and then add our favorite toppings! You can freeze this dough in its many forms and you will always have a variety of choices on hand. This bread also freezes well after it has baked and cooled completely.

Want hot cinnamon rolls on Saturday morning? If you are baking Friday night and want fresh rolls the next morning, simply make the cinnamon rolls and then put them, covered, in the refrigerator to slowly rise overnight. Take them out in the morning, let them warm up and complete the rising process and then bake!

Whole Wheat and Seeds Bread
(My Absolute Favorite High Fiber Bread Recipe-I Make All Of The Various Bread Forms With This Super Healthy Recipe)

10 cups of wheat berries
1 cup of barley
1 cup of brown rice
1 cup flaxseeds (ground in blender or coffee grinder)
1 cup sesame seeds (ground in blender or coffee grinder)
6 cups of hot tap water (if you like sour dough, use 5 cups of hot water and 1 cup of sourdough starter liquid)
1 cup olive oil
1 cup honey
3 Tlb. Saf yeast
2 Tlb. Salt (more if you want)

Grind wheat berries, barley and rice in Mill. Grind flaxseeds and sesame seeds in the blender attachment. Dump the seeds into the mixer and then fill the blender attachment with 6 cups of hot tap water. Add 10 cups of freshly ground wheat flour. Add olive oil and honey and yeast. Turn mixer to speed 1 for about 1 minute or less until mixed. Then put the plastic lids on the mixer and set a timer for 10 minutes. Let the mixture sit and "sponge." After sponging, run the mixture on speed 1 and add the salt and remaining flour until the dough just begins to clear the sides of the bowl. Set your timer for 5 minutes and let the mixer knead the dough. After 5 minutes, let the dough sit for about 2 or 3 minutes. . .if the dough is not sticky and looks smooth, you are ready to dump the dough onto an oiled counter top. Oil your hands, shape the dough into a big ball and then cut it into 6 equal pieces. For nutty bread, throw in 1 cup of raw sesame seeds.

Replace wheat with Spelt if you wish, or do a half wheat, half spelt mixture.

HAND KNEADING (IN CASE YOU DON'T HAVE A KITCHEN CENTER. . .YET!)

Denise's Honey Whole Wheat Bread:

Have on hand: 2 1/2# (9-10 cups of flour) of freshly milled hard Montana Spring whole wheat flour (order through the Co-op)

In large mixing bowl place:
3 cups hot water (115-125 degrees)
1/3 cup honey
1/3 cup olive, sunflower, safflower or oil of choice
5 cups of the flour
1 1/2 Tablespoons SAF instant yeast1 Tablespoon dough enhancer (optional, gives a lighter and fluffier texture)

Mix above with a large wooden spoon and then cover and let set until double in size and bubbly. This is called a sponge and will take approximately 15-30 minutes. Then add:

1 T. salt(I use Realsalt™)
And add enough of the remaining flour until it cleans the sides of the bowl. Touch the dough to see if it needs more flour. If it is real wet and sticky, add a bit more flour until it is no longer wet. You want to achieve a smooth and satiny feel to the dough. Don't add too much flour or you will create a heavy loaf.

To begin the process of hand kneading, you should have a large mass of dough in front of you on the countertop that feels moist to the touch but not 'sticky'. Start by pushing away and pulling forward the dough and then give it a ¼ turn and push and pull again. Continue this process until the dough is smooth and satiny feeling. It should feel rather 'light and springy' to the touch. This could take anywhere from 10-30 minutes depending on the recipe and how vigorous a kneader you are! When you are pushing and pulling, be sure to pull the dough up and over from front to back and back to front. See directions for heavy-duty mixer kneading above for shaping and baking.


TIPS & TECHNIQUES

The Ultra Mill is the most economical mill on the market. If you are interested in "mega" baking (more than 20 cups of flour at a time) you may want to order another mill. Please email Monica@YourHealthSource.Org for information on other types of mills.

First and foremost be sure that your ingredients are fresh and at room temperature. Cold flour that may have been stored in the freezer should be brought to room temperature. Ultimately, your flour should be ground fresh for the maximum amount of nutrition and flavor! (I keep frozen flour or bread for no longer than 1 month)

Ingredients for Great Bread:

" Extra Virgin, first cold pressed Olive Oil (not heat treated, not "extra light tasting" olive oil)
" Raw, unfiltered, local honey or 100% maple syrup (you can substitute other forms of sweetener)
" SAF professional yeast, needs no "proofing" In other words, you don't have to check it. . .it is consistently good. Store your yeast in a sealed container in the refrigerator or freezer.
" Hot water 115 to 120 degrees
" Freshly milled, high quality grain(need high protein content)
" Real Salt™ or Sea Salt
(Remember to use a variety of grains rather than the same grains over and over.)

Wheat conversions:
1 cup uncooked wheat = 2 cups cooked wheat

2 cups whole wheat = 3 cups ground flour
1 lb whole wheat = 24/4 cups wheat berries

Fresh milled flour starts to oxidize immediately and studies have shown that within a few days it can be completely rancid. I use high-gluten hard spring wheat from Montana to get the highest rising bread possible. Extra virgin olive oil or cold-pressed safflower or sunflower are the best oils to use for maximum freshness. Raw honey contains the most nutrients and helps to keep the bread fresher longer. Salt should be unprocessed sea salt or I prefer to use RealSalt™ because it is naturally mined from the earth and contains minerals. Most salts(including many sea salts) are heat treated and contain free flowing agents such as aluminum or sugar to keep them flowing smoothly. Realsalt is not heat treated.

I do most of my baking with SAF instant yeast. It's a professional baker's yeast that needs no proofing. Proofing is when you add the yeast directly to the water with a pinch of sugar to see if it's still alive. You can add the SAF yeast directly to the flour instead of proofing it in the liquid. Because it is a highly potent yeast, you use about 1/4 less of it than regular yeast.

As for baking pans, I use stoneware or glass baking pans. Stainless Steel pans are a wonderful choice, as well. Brushing the pan with olive oil works to keep the loaves falling right out of the pans. I do not use pan sprays because they have propellants and are not the best for the environment or for baking stones. Instead, make your own by adding 2 tsp to 2 cups olive oil. This will make your breads fall out of the pan everytime!

THINGS TO KEEP IN MIND WHEN USING AN ELECTRIC MIXER:

1. Be careful not to add too much flour! In the beginning this is very tempting and easy to do but in the end, you will wind up with a very heavy loaf.

2. Do not be tempted to over-knead. Because these machines are extremely powerful, it's very easy to over-knead the dough. If the dough goes from soft to stretchy to big globs that break apart in your hand, then you have most likely over-kneaded the dough. Usually anything over 10 minutes will do this. Be sure to perform the gluten test after about 5-7 minutes of kneading to prevent this from happening. (See below for proper gluten development information) Speed 1 on the Bosch™ Universal is sufficient for bread kneading.

If the dough feels heavy and just breaks apart and is not stretchy, then you must continue to knead a little longer. However, this can also happen if you have overkneaded the dough...it will go from soft and stretchy to heavy and sticky.

You will know this immediately if the dough goes from cleaning the sides of the electric mixer bowl to being very sticky on the sides of the bowl no matter how much more flour you add. Do not worry about over-kneading by hand, it would be very hard to do.

3. Usually Kneading on the lowest speed is sufficient for kneading bread. The higher speeds are most often reserved for using the blender or attachments.

CHECKING FOR PROPER GLUTEN DEVELOPMENT

Proper gluten development is important for a high-rising loaf of bread. It's formed when the protein part of the wheat is kneaded and it becomes stretchy and elongated. The carbon dioxide gas that is formed by the yeast is trapped in the gluten web thus causing the dough to rise. After kneading the dough into a soft and smooth consistency, it should feel rather "stretchy" but not "sticky." This will take anywhere from 3-10 minutes in an electric mixer to 10-20 minutes by hand.