Showing posts with label Recipes. Show all posts

Thursday, April 02, 2009

Harold Garnes Bran Muffins

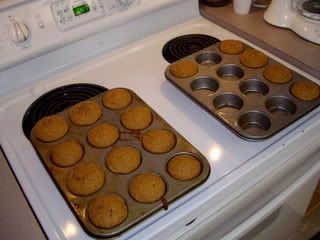
I made these the other day and as usual shared them with my sister. She has finally decided that she wants to know how to make them herself (I LOVE YOU SILLA :). So I'm posting this for her and putting it on my blog so that I can easily share it with others.

A man named Harold Garnes and his wife Francine were friends of our family. Harold was a medical doctor. He has since passed on and his wife has moved to Florida (I hope to find her one of these days) but this bran muffin recipe he would make and share with us still reminds us of him. This recipe is tasty and great for keeping you regular.


3 C Kellogs All Bran
2 3/4 C milk
2 1/2 C whole wheat flour (freshly ground works fine; 2 cups of wheatberries is plenty)
1/2 C sugar
1 1/2 C raisins
1 1/2 C chopped apples (1 large apple - I love my Tupperware chopper for this)
2/3 C oil (I normally use vegetable)
1 tsp salt
8 tsp baking powder
1 tsp nutmeg
2 Tbs cinnamon
2 eggs

Mix bran & milk together. Let stand together in a bowl. Mix dry ingredients together. Add eggs to bran & milk mixture. Stir well and then mix wet & dry together. Bake @ 350 for 20 minutes. Makes 24 muffins. 3 points (Weight Watchers)

Saturday, October 06, 2007

Our Breakfast Rotation

I was asked to share our breakfast rotation when I asked for lunch ideas. Let me say first of all that my rotation is BORING, but it keeps life simple and easy in the mornings when we are all finding our way. That said, here it is:

Mondays - Cold Cereal (Raisin Bran, Granola)
Tuesdays - Smoothies (mostly strawberry banana) and Muffins (all different kinds)
Wednesdays - Eggs (Scrambled, or boiled) with Toast
Thursdays - Oatmeal
Fridays - Pancakes or Waffles with yogurt. (thanks to Gracie)
Saturdays - Smoothies (again) or Yogurt and then we sometimes make a donut run.
Sundays - Hodge Podge. I've made biscuits and eggs, served fruit and toast, yogurt, or even made oatmeal again.

Yes...we do eat fruit almost every morning and, Yes...this menu is the same EVERY WEEK. We are all used to it and it means that we can move on to more interesting things. I'd love to hear your other ideas.

Wednesday, October 03, 2007

WFMW: Favorite Kid Lunches

I would really like to make a rotating schedule for lunches. I've got breakfasts down to a science and dinner doesn't seem so hard, but ,well, lunches....that's another story.

I'd like to get as many ideas written down as I can think of, put them in an order that makes sense (so that we don't have only sandwiches everyday for a week) and then just go through them so I don't have to think about it!

PLEASE give me your lunch ideas that your kids love and that aren't too hard to fix. I'm not gonna be too picky...my kiddos will eat almost anything. Just give me what works well at your house!

Thanks in advance!

Check out some of my other recent Works-For-Me-Wednesday ideas:
Or simply click HERE to see view all of them!...

Be sure to check out Rocks in My Dryer for more Works-for-Me Wednesday tips.

Tuesday, September 25, 2007

Lemon Pepper Crockpot Chicken

*** See Edit to recipe below ***

OK...so I guess that I'm still a little consumed with gathering recipes to make for the "fam". I got an idea from another homeschooling Mom on the forums for Sonlight Curriculum (great fodder for a homeschooling mama) and I tried it with a little "Chrystal-ness" mixed in. This recipe is EMBARASSINGLY EASY.

Throw 4 boneless skinless chicken breasts in the crock.

Use a knife to put pats of butter on the chicken breasts (about half a stick or so or more :)

Sprinkle Lemon Pepper seasoning liberally over the chicken. I guesstimate that I probably used about 2/3 c. I'd start with 1/2 c, see how that looks, and then go from there.

*** EDITED to add: This amount of Lemon Pepper was TOO MUCH. The taste was great, but I didn't realize that the Lemon Pepper Seasoning is mainly SALT (not to mention that there isn't really lemon in it but Citric Acid)! Shows you how much I venture beyond basic salt, pepper, and herbal seasonings! I'd probably start with 1/4 c and then see how you like it from there. A note to self for next time, just use salt, pepper, and squeeze fresh lemon, I'll have more control and then can add other herbal seasoning as I like.

Turn on your crockpot!

See...I told ya...super-duper easy!

I just stuck in a fork and broke off a piece of chicken to sample. Unbelievably delicious. I added a bit of thyme to balance the tangy of the lemon pepper.

I plan to serve with leftover rice and roasted potatoes (both leftovers). My plan was to use the potatoes but the chicken made the best gravy so I pulled out the rice too so that my family can choose what they prefer. I also pulled out some frozen mixed veggies (California Blend from Wally World). The chicken is finishing in the crockpot and the rice/potatoes are warming in oven. The veggies are in the steamer on the stove, ready to cook in 10 minutes flat once I turn it on. All this in under 15 minutes of prep time...most of which was just "set-up"!

Hope this inpires somebody. Gather some chicken breasts (or boneless/skinless thighs for dark meat lovers) and throw in your favorite seasonings and cook. You can always season to taste near the end of the cooking.

Believe it or not, chicken in the crockpot (I've done all kinds) doesn't require a lot of seasoning or work. I have thrown in chicken in the crockpot with NOTHING...and just added a seasoning here or there around dinner time, shredded for a Mexican dish, cut into chunks for casserole/pot pie, or put it in Tupperware for a later meal when we decide to eat out at the last minute. You can be healthy with all of this or not so healthy.

Cooking inspires creativity! Just go with the flow!

Wednesday, September 19, 2007

Need MORE Recipes?

One of the questions I get more than other is how do I come up with things to cook? I've already posted about one great resource. Here's another of my favorites...

Menus 4 Moms

I've added the menus for the next two weeks to my right sidebar. Scroll down and see what you think. There is a link at the end of each week's menu that will give you the recipes and grocery list for the following menus. The menus will update automatically so if you are ever in need of ideas, just pop back to my blog and take a look!

Hope this makes the responsibility of preparing home-cooked, nutritious foods for your family a little easier!

Homemade Salad Dressing

This is a oil and vinegar dressing that tastes great and is good for you. Try it out one day!

THE DRESSING

1/2 c. olive oil
1/3 c. apple cider vinegar
1/4 c. honey
1 t. salt
1/8. t. pepper

I double it and keep some on hand, since we all like it so much. Keep in the refrigerator. Don't be weirded out when you go to get it and the oil and vinegar have separated. Just take it out a bit before you need to use it and set at room temperature then shake and pour when you are ready to use.

Need Recipes?

We receive a seasonal magazine called Kraft Food & Family. It is a good source for recipes ideas that are simple and often quick to prepare. Best of all, it's FREE!

Click HERE to sign up and get your copy!

Those of you have read my blog for any length of time know that I'm a journey to better eating and healthy living. There are many recipes in this magazine that use processed foods as the magazine's primary goal, I'm sure, is to sell more Kraft products. Still, for dinner ideas or helps when you are just trying to get dinner on the table, healthy or not, this magazine is a big help - especially if you just need ideas for putting adding variety to your table. As I've learned more about nutrition, I've taken these recipes and subsituted better food choices for some of the ingredients (fresh homemade salsa for canned salsa, homemade salad dressing for salads, etc)

It also gives my kids a good source for coming up with ideas when it's their turn to fix a meal. My daughter fixed Orange Chicken in the crockpot yesterday and it was fantastic! She added rice and sauteed green beans to finish it off. Everyone wanted seconds and I enjoyed not having to make dinner!


Slow Cooker Orange Chicken
From Kraft Food & Family

Prep Time: 10 min
Makes about 4 servings.

8 small boneless skinless chicken thighs (1 lb.)
3 Tbsp. flour
1/3 cup orange marmalade
1/3 cup Original Barbecue Sauce
2 Tbsp. soy sauce
1 Tbsp. freshly grated gingerroot

Directions

TOSS chicken with flour in slow cooker.

STIR in all remaining ingredients; cover with lid.

COOK on LOW for 6 to 8 hours (or on HIGH for 3 to 4 hours).

Serving Suggestion
Serve with hot cooked rice and steamed green beans.

To Double
Serving a crowd? Prepare as directed, doubling all ingredients and increasing the cook time to 8 hours on LOW (or 6 hours on HIGH).

Tuesday, July 24, 2007

Another Late Night...

It's dark thirty and I'm still up...trying to get it together to get out of dodge. I knew that motherhood wasn't for the faint of heart but GOLLY!

We are really watching our food budget and so my normal mode of operating would have had me at Walmart in the frozen food section picking up a bunch of convenience, "nuke-ready" foods...but as luck the Lord would have it, my heart has blossomed into that of a mother who actually cares desires to see her children eat well in her absence. Also, eating foods prepared by Mom costs less :)

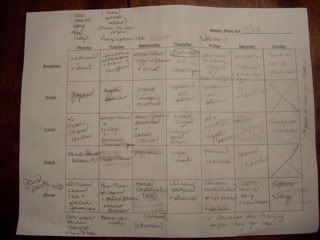
So last night, I planned out a menu for the next week and a half. I tried to use as much stuff as possible that was already in my pantry so I wouldn't spend unnecessarily. Then I tried to order my meals where I could "bulk cook" and use the resulting food for multiple recipes. Anyway, I left my house for the Walmart 3 minutes down the street at 11pm (I got home at 12:30am...crazy I know). I spent right at $120 for groceries and that included meat (actually 3 chickens on sale and some lunch meat), paper towels, paper plates/cups, and diapers. It also included a large package of frozen corndogs, instant oatmeal, a frozen lasagna, and a couple of other "snacky" items for backup food when Antie or Granny need something quick. I was very proud of myself!. Here's a picture of one of my menu pages...


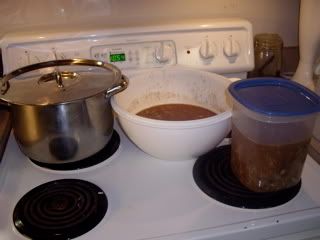
So here's what I've been working on today.


That's pinto beans soaking in the silver pot. We'll have beans and cornbread for lunch tomorrow and the next day this will become bean burritos for dinner. Chicken Tortilla soup is what's in both the white plastic and clear plastic bowl. Both were cooling but the clear goes into the fridge for the kids to eat in a couple of days and the other will be poured into a plastic storage bag then put into the freezer to help me out when I get back home and don't feel like cooking.

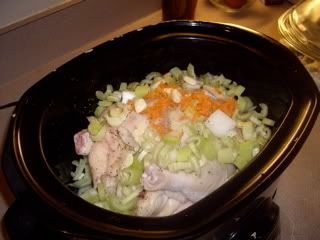
Bessie, my 11 year old, loves to chop and dice and decided to lend a hand. I taught her how to clean a chicken, season, and decorate it for the crockpot.


This bird will help me make chicken enchiladas and a chicken pot pie to put away for my family (and no...I'm not going to make the crust from scratch).

I tell ya...I feel like Proverbs 31 material TONIGHT! Well...I would have felt even better if I had gotten around to making bread for my kids before I left but my husband told me to quit while I was ahead reserve my energy and just pick up a couple of loaves from the store (I hate when I get backed into a corner and have to do this...makes me feel like a failure...can you tell I'm a perfectionist?)

Oh, by the way, I closely follow the recipes linked above...but...I get a little creative at the end making them like I want them to taste. The tortilla soup gets a couple of cans of black beans not called for in the original recipe as well as a tablespoon of cumin versus a teaspoon. I didn't have Cilantro, and I didn't use green chiles or enchilada sauce because of spicyness. I add a can of tomato sauce instead. Confusing enough? Awww come'on...I'm trying to let my inner chef out :)

So I'm off to catch a wink of sleep before I wake up and keep on chugging along. I figure I can go comatose once I get on the plane ...

Friday, July 20, 2007

Simple Bread Baking By Hand...

I posted a SUPER LONG post a little ways back about my bread baking. In retrospect, it was overwhelming to say the least. Although there are a lot of super great tips, I neglected to make sure I left instructions for those of us who might be just getting started with making bread by hand. The following is a condensed reprint of Marilyn Moll's Bread Recipe from Urban Homemaker. Marilyn's website is WEALTH of information. Be sure to check her out!

Don't worry about the special stuff this recipe calls for if you don't have it. Regular yeast from the store will suffice to get started and so will Vital Wheat Gluten if you don't have Dough Enhancer. The longer you bake bread the fancier you can get! Just get started. If this recipe seems to be too much just get any old recipe and start somewhere! You'll love your own homemade bread!

Hand Method: (yields 2 loaves)

1/3 C honey
1/3 C oil
2 1/2 C Warm Water
1 1/2 TB Saf Instant Yeast
2 1/2 tsp Real Salt
6-7 C Fresh whole wheat flour
1 1/2 TB Dough Enhancer


Combine the warm water, yeast, and 2 Cups of fresh whole wheat flour in a large mixing bowl. Allow to sponge for 15 minutes. Add the honey, oil, dough enhancer, salt and 4-5 C additional flour until the dough begins to clean the sides of the mixing bowl. Do not allow the dough to get too stiff (too dry). Dough should be smooth and elastic. It is a common mistake for the beginning bakers to add too much flour.

Knead the bread by hand 7-10 minutes or until it is very smooth, elastic, and small bubbles or blisters appear beneath the surface of the dough. Six to ten minutes of kneading by electric mixer should be sufficient to develop the gluten if you are using fresh flour. If you are kneading by hand, be sure to add the minimum amount of flour to keep the dough soft and pliable by using a tsp of oil on your hands and kneading surface.

Form the dough into 2 loaves if using the hand method. Place the dough into greased loaf pans. Allow to rise in a slightly warmed oven or other warm place until doubled in size (about 30-60 minutes).

Bake loaves for 25-30 minutes in a 350 degree oven. Bread is cooked through when it sounds hollow when tapped on the bottom, and when the top and sides are a golden brown color.

HomeMade Onion Soup Mix

I got this recipe from a friend and we use it just as we would use any package of Lipton Onion. I haven't calculated the cost of making it to verify that it is less expensive BUT...making things kinds of things myself ensures two things: One, they do not include any extra chemicals such as preservatives and flavors; second, I always have an amply supply (no last minute runs to the store for missing ingredients). It takes almost no effort to mix and then it's just sitting in my pantry ready to use!

To Make One Packet's Worth (approx a heaping 1/4 cup)...

8 tsp dried onion flakes
4 tsp beef bouillon granules
1 tsp onion powder
1/4 tsp pepper
1/4 tsp celery

To Make 6 Packets Worth (approx 2 cups worth)...
This can be stored in a pint-sized mason jar or some other type of airtight container.

2 cups dried onion flakes
1 cup beef bouillon granules
1/4 cup onion powder
1 tsp pepper
1 tsp celery

To Make 12 Packets Worth (approx 4 cups worth)...
This can be stored in a quart-sized mason jar or some other type of airtight container.

1 cups dried onion flakes
1/2 cup beef bouillon granules
2 tbs onion powder
1/2 tbs pepper (or 1 1/2 tsp)
1/2 tbs celery (or 1 1/2 tsp)

When I first started using bulk spices/seasonings for some of my more frequent recipes and mixes, I bought from Whole Foods, Central Market, or my local health foods store. You can purchase in exactly the amount you like in their bulk section rather than the little-bitty containers that are available at regular grocery stores. You can purchase bulk seasoning online for cheap by googling some resources (looks to be supercheap although I have yet to try) or you can purchase organic seasonings in bulk from Mountain Rose or Frontier. I've personally purchased from Frontier for organic spices/herbs/etc.

Wednesday, June 27, 2007

WFMW - Carrot Cake Muffins

I am part of an organic produce coop. I love the fact that I receive a box of food every other week. It keeps me out of the store and from misspending. It also keeps me trying new fruits/veggies because sometimes I receive things I wouldn't every chance buying from the store.

Anywho, sometimes I get more of something than what I have planned to use. We always get carrots. I don't juice (yet?) so I'm always looking for yummy ways to sneak them in.

Here's a recipe I tried recently and the kiddos loved it :)

Carrot Cake Muffins

Sift 1 cup of whole wheat flour with 1 cup of oat flour (I didn't have oat flour and didn't want to make any so I just used 2 cups of whole wheat). Sift in 2 tsp of baking soda and 1 1/2 tsp of cinnamon also.

Then, add 3/4 cup of wheat germ, 1/2 cup brown sugar, and 3/4 tsp of salt. You can also add a protein powder in ( I didn't)

In a separate bowl, combine 3/4 cup applesauce, 3/4 cup of milk (you can use skim but I used 2%), and 4 large beaten egg whites (next time I'll try the whole egg). Add this lumpy mixture to your dry ingredients. Finally, fold in 2 cups of carrots.

Bake at 375 for about 15-18 minutes.

Obviously the originally recipe is a low-fat one. I just used what I had on hand. Tasty!

Be sure to check out Rocks in My Dryer for more Works-for-Me Wednesday tips.

Tuesday, June 26, 2007

Baking Bread - RECIPE!!!

If you are considering not bothering to read this post because you don't even know WHY I would want to bake my own bread...read THIS...it explains why homemade wheat bread is so good tastin' and good for you.

This post is EXTREMELY long. It contains the recipe and instructions for the bread that I make at home from scratch. The original recipe is at www.yourhealthsource.org. My recipe for Whole Wheat Bread is tweaked a bit from the original.

Before you even read further, know that I have a posted a simple recipe for baking bread by hand too (yield = 2 loaves). Please don't be discouraged from trying. I'm just an information junkie and want to share as much as I can...

Bread making doesn't have to be difficult. Any 'ol recipe book will give you a good start. When I decided to try making bread I picked up the red-and-white checkered Better Homes and Garden Cookbook and made homemade white bread. It was very good. Then I made wheat bread from the recipe on the back of the whole wheat flour package bought from WalMart. It was tasty too.

I started making bread three years ago and I'm still learning. Life is a journey; so is making bread :)

The first recipe assumes you are milling your own wheat into flour and using a Bosch Universal Mixer. If you don't have the equipment to mill your flour, start with the flour from the store or find someone near you who DOES mill their flour. Further down you will find the recipe for making bread by hand. This bread is GOOD and yield 6 loaves. It's the same bread I use to make cinnamon rolls!

WHOLE WHEAT BREAD

You will be delighted with how simple bread making can become. Bread can be ready to eat in as little as 1 ½ hours!

12 cups wheat berries
2/3 cup olive oil
2/3 cup honey (Sometimes mine ends up being a cup :)
6 cups warm water (120 to 130 degrees)
(I use 5 cups of water and 1 cup of STARTER)
3 tablespoons yeast
2 tablespoon salt

Makes 6 loaves
Preparation time: 30 minutes
Rising and cooking time: 40 minutes

1. Using the mill, grind 12 cups of hard Prairie Gold Montana Wheat (important to have high quality, triple washed, certified chemical free wheat-this is the safest for your mill and is grown for human consumption, with plenty of protein) (12 cups of wheat berries= approximately 18-20 cups of flour)

2. In Bosch™ bowl, use the Dough Hooks to mix the honey, oil, water, and yeast. Be sure the plastic splash guard is on the mixing bowl.

3. While running the mixture at low speed, add 10 cups of flour and then the salt.

4. Stop the machine and set a timer. (10-15 minutes in the winter-10 minutes in the summer) Put the lid on the bowl to capture the moisture and warmth of the mixture. Let sit until timer goes off or until dough rises almost to the top of the bowl. This is called letting the dough "sponge."

5. Turn the machine on 1 and continue adding flour until the dough clears the sides of the bowl.

6. Knead on a low speed for 4 to 5 minutes. Let the dough sit for 1 to 2 minutes, then check for gluten development. (see Tips & Techniques) The dough should stick to itself, not to you.

1. Press the dough and it will spring back.
2. Dough clings to itself and not you.
3. Dough is translucent when stretched, you can see light through it.


7. This is the fun part! Take the dough out of the bowl by dumping it onto an oiled countertop or large cutting board. (no need to add flour from this point forward) Pick the dough up and slam it down a few times. Slamming the dough helps remove any air bubbles that may have formed. Simply dump the dough and then shape it into a large circle. Using regular kitchen scissors, cut the dough (like a pie) into 6 equal pieces. Each of these pieces of dough can now be used to make a variety of bread forms. (use a kitchen scale to weigh the dough if you want 6 perfectly equal parts) Some of the possibilities are: loaf of bread, cinnamon rolls, foccaccia bread, bread sticks, dinner rolls, pretzels, tea rings, hoagie buns, filled breads/buns, sandwich bread, 3 ball dinner rolls, crescents, pizza crust, sticky balls/monkey bread, cinnamon twists, herb/garlic bread, braided breads, etc. See instructions below for shaping the dough.

8. Shape into the desired form and let rise in a warm oven for about 20 minutes or on the counter for 1 hour, OR until the bread doubles in size.

9. Bake at 350 degrees. If your bread is rising in the oven, simply turn on your oven and let it preheat with the bread already inside. You may want to experiment with taking the dough out of the oven and letting the oven get to the full 350 degrees and then put the dough back in. I like to just turn on the oven without removing the dough because it saves me a few steps.

10. Get to know your oven. . .rolls and pizza crust take less time, loaf bread takes up to 30 minutes in some ovens. I usually bake rolls for 15 minutes (or less) and bread for 20 to 25 minutes.

SHAPING THE DOUGH

After forming the dough into the shape of a large circle. Cut the dough into 6 equal pieces. Now you have the beginnings of a variety of bread forms. 1/6 can become any of the following forms, or any you can dream up! Set aside 5 portions of dough and cover with moist cloth.

LOAF OF BREAD, simply take 1/6 of the dough and shape it into a long, narrow loaf and place into a prepared (oiled) bread pan. Pat down any remaining air bubbles.

CINNAMON ROLLS, simply roll dough out into a rectangle shape, (at least 10 by 14 inches) then add your favorite ingredients. If you want extra fluffy cinnamon rolls, experiment with more yeast in your basic recipe. I've used up to 5 tablespoons.

Here's what I do: spritz the entire face of the bread with olive oil, sprinkle with chopped pecans, cinnamon, finely ground coconut and organic raisins. You can try applesauce, chopped bananas, maple syrup, etc. This bread is so good for you, I don't mind a simple sugar frosting. In our household, we drizzle fresh cinnamon rolls with maple syrup and by pass the traditional sugar coating. Roll up the dough and then use scissors or dental floss to cut the dough into traditional cinnamon rolls. Place them ¼ to ½ inches apart in a prepared pan and bake for 15 to 20 minutes.

FOCACCIA BREAD, simply roll dough out into a rectangle shape.(10 by 14 inches) I use a jelly roll stone and spread the dough out with a roller. I let the dough rise and then spritz it with olive oil and follow with Italian herbs or a Rosemary herb blend. We serve Focaccia bread with marinara sauce (spaghetti sauce) and a salad. Very easy and very yummy! This bread is also great dipped in an olive oil/balsamic vinegar/Italian seasoning mixture. Try kneading dried tomato bits, chopped onions & garlic into this dough before you roll it out.

BREAD STICKS/PRETZELS/CINNAMON TWISTS, take 1/6th of the dough and make it into a circle. Cut the circle into 8th and each piece can become a bread stick. Simply use your hands to roll the dough into long pieces. Place the dough on a prepared pan or cookie sheet, spritz with olive oil and your favorite seasonings(for pretzels, dip the pretzel in a large bowl of water and then add coarse salt) and bake for 10 to 15 minutes. You may want to lightly knead spices into the bread and then shape them for bread sticks. Cinnamon Twists are just bread sticks that have been rolled in olive oil or maple syrup and then in a mixture of cinnamon and sugar, then twisted and placed on a prepared baking sheet. Keep in mind, these products will need less cooking time. Probably 12 to 15 minutes.

DINNER ROLLS, again, taking 1/6th of the dough, form the dough into a circle and then cut it into 8ths. Each 8th makes a large dinner roll. Place dinner rolls about ¼ to ½ inch apart in your prepared pan.

THREE BALL DINNER ROLLS, 1/6 divided into 8 equal portions. Each portion is then divided into three equal parts. Roll the parts to form small balls and then place three balls into each muffin space.

PIZZA CRUST, using 1/6th of your dough, spread the dough onto a pizza stone as thin as you like, prick and bake for 15 to 20 minutes. If you like soft crust, let the dough rise and then bake. If you want crispy crust, do not let the dough rise, prick it and then bake immediately.

STICKY BALLS/MONKEY BREAD, Use a round cake pan with 2 to 3 tablespoons of olive oil in the bottom of the pan. Add honey or maple syrup and pecans or walnuts. Sprinkle with cinnamon. Gently knead raisins into the dough and roll dough into 1" balls and fill the pan with the balls touching. Let it rise and then bake. Turn pan upside down on a platter to serve. Variation: roll each dough ball in a maple syrup mixture and then roll the wet dough in a mixture of cinnamon, finely ground coconut, raisins, and nuts and then place in the pan, prepared with olive oil and syrup as previously instructed. Cooking time may be longer depending on the amount of moist ingredients.

BRAIDED BREADS, these are so fun and beautiful. Divide 1/6 of the dough into three equal pieces. Roll the pieces into long strands and braid your bread. Or, divide the 1/6 of dough into two equal parts, roll the pieces out, into a 4 by 12 inch rectangles. Place spices, veggies and marinara sauce down the middle of each strip. Fold each strip in half and seal the edge. Now you have two long, sealed, stuffed breads. Twist the strands together and you now have a beautiful stuffed bread. Try sweet ingredients, too. Cinnamon, pumpkin, raisins, nuts, dried cranberries, etc.

BURGER BUNS, Divide 1/6 of your dough into 4 equal parts. Shape into the form of traditional burgers. Rise, bake, cool and cut in half. Press sesame seeds on top if you like.

Use your imagination! Go to your local library for illustrated bread books!

RISING THE DOUGH
Cover and let rise until double in a warm draft-free place. This should take anywhere from 20-40 minutes. Or, preheat your oven, turn it off and place loaves in the warm oven.

If desired, brush olive oil on your loaves for a brown crust. Sprinkle with oat, rye, or whole grain flakes. Sesame or poppy seeds work well too. This makes a beautiful presentation and the flakes or seeds add a delicious 'toasted' flavor to the bread.

RISEN DOUGH READY TO BAKE
Bake at 350 degrees. Rolls, 20-25 minutes. Loaf bread, 25-35 minutes. Many ovens vary on temperature, if you are not sure, buy an oven thermometer to check your oven's exact temperature. Another surefire way to tell if your bread is done is to stick it with an instant-read thermometer. It should read 200 degrees.

Fresh from the oven, your bread is ready to eat. The whole process takes approximately 1 ½ hours!

Almost every time I make my bread, I freeze dinner rolls prior to rising. I simply shape the rolls and place them on an ovensafe dinner plate and put them in the freezer. When I am ready for fresh from the oven bread, I take the plate out of the freezer, let the rolls thaw and rise and then bake them. Delicious and very convenient. If you need the dough to thaw quickly, preheat your oven, turn it off and then put the dough in the oven to warm and rise.

When we are hungry for pizza, we will thaw the same dinner rolls, roll them into individual round pizza crusts, bake them and then add our favorite toppings! You can freeze this dough in its many forms and you will always have a variety of choices on hand. This bread also freezes well after it has baked and cooled completely.

Want hot cinnamon rolls on Saturday morning? If you are baking Friday night and want fresh rolls the next morning, simply make the cinnamon rolls and then put them, covered, in the refrigerator to slowly rise overnight. Take them out in the morning, let them warm up and complete the rising process and then bake!

Whole Wheat and Seeds Bread
(My Absolute Favorite High Fiber Bread Recipe-I Make All Of The Various Bread Forms With This Super Healthy Recipe)

10 cups of wheat berries
1 cup of barley
1 cup of brown rice
1 cup flaxseeds (ground in blender or coffee grinder)
1 cup sesame seeds (ground in blender or coffee grinder)
6 cups of hot tap water (if you like sour dough, use 5 cups of hot water and 1 cup of sourdough starter liquid)
1 cup olive oil
1 cup honey
3 Tlb. Saf yeast
2 Tlb. Salt (more if you want)

Grind wheat berries, barley and rice in Mill. Grind flaxseeds and sesame seeds in the blender attachment. Dump the seeds into the mixer and then fill the blender attachment with 6 cups of hot tap water. Add 10 cups of freshly ground wheat flour. Add olive oil and honey and yeast. Turn mixer to speed 1 for about 1 minute or less until mixed. Then put the plastic lids on the mixer and set a timer for 10 minutes. Let the mixture sit and "sponge." After sponging, run the mixture on speed 1 and add the salt and remaining flour until the dough just begins to clear the sides of the bowl. Set your timer for 5 minutes and let the mixer knead the dough. After 5 minutes, let the dough sit for about 2 or 3 minutes. . .if the dough is not sticky and looks smooth, you are ready to dump the dough onto an oiled counter top. Oil your hands, shape the dough into a big ball and then cut it into 6 equal pieces. For nutty bread, throw in 1 cup of raw sesame seeds.

Replace wheat with Spelt if you wish, or do a half wheat, half spelt mixture.

HAND KNEADING (IN CASE YOU DON'T HAVE A KITCHEN CENTER. . .YET!)

Denise's Honey Whole Wheat Bread:

Have on hand: 2 1/2# (9-10 cups of flour) of freshly milled hard Montana Spring whole wheat flour (order through the Co-op)

In large mixing bowl place:
3 cups hot water (115-125 degrees)
1/3 cup honey
1/3 cup olive, sunflower, safflower or oil of choice
5 cups of the flour
1 1/2 Tablespoons SAF instant yeast1 Tablespoon dough enhancer (optional, gives a lighter and fluffier texture)

Mix above with a large wooden spoon and then cover and let set until double in size and bubbly. This is called a sponge and will take approximately 15-30 minutes. Then add:

1 T. salt(I use Realsalt™)
And add enough of the remaining flour until it cleans the sides of the bowl. Touch the dough to see if it needs more flour. If it is real wet and sticky, add a bit more flour until it is no longer wet. You want to achieve a smooth and satiny feel to the dough. Don't add too much flour or you will create a heavy loaf.

To begin the process of hand kneading, you should have a large mass of dough in front of you on the countertop that feels moist to the touch but not 'sticky'. Start by pushing away and pulling forward the dough and then give it a ¼ turn and push and pull again. Continue this process until the dough is smooth and satiny feeling. It should feel rather 'light and springy' to the touch. This could take anywhere from 10-30 minutes depending on the recipe and how vigorous a kneader you are! When you are pushing and pulling, be sure to pull the dough up and over from front to back and back to front. See directions for heavy-duty mixer kneading above for shaping and baking.


TIPS & TECHNIQUES

The Ultra Mill is the most economical mill on the market. If you are interested in "mega" baking (more than 20 cups of flour at a time) you may want to order another mill. Please email Monica@YourHealthSource.Org for information on other types of mills.

First and foremost be sure that your ingredients are fresh and at room temperature. Cold flour that may have been stored in the freezer should be brought to room temperature. Ultimately, your flour should be ground fresh for the maximum amount of nutrition and flavor! (I keep frozen flour or bread for no longer than 1 month)

Ingredients for Great Bread:

" Extra Virgin, first cold pressed Olive Oil (not heat treated, not "extra light tasting" olive oil)
" Raw, unfiltered, local honey or 100% maple syrup (you can substitute other forms of sweetener)
" SAF professional yeast, needs no "proofing" In other words, you don't have to check it. . .it is consistently good. Store your yeast in a sealed container in the refrigerator or freezer.
" Hot water 115 to 120 degrees
" Freshly milled, high quality grain(need high protein content)
" Real Salt™ or Sea Salt
(Remember to use a variety of grains rather than the same grains over and over.)

Wheat conversions:
1 cup uncooked wheat = 2 cups cooked wheat

2 cups whole wheat = 3 cups ground flour
1 lb whole wheat = 24/4 cups wheat berries

Fresh milled flour starts to oxidize immediately and studies have shown that within a few days it can be completely rancid. I use high-gluten hard spring wheat from Montana to get the highest rising bread possible. Extra virgin olive oil or cold-pressed safflower or sunflower are the best oils to use for maximum freshness. Raw honey contains the most nutrients and helps to keep the bread fresher longer. Salt should be unprocessed sea salt or I prefer to use RealSalt™ because it is naturally mined from the earth and contains minerals. Most salts(including many sea salts) are heat treated and contain free flowing agents such as aluminum or sugar to keep them flowing smoothly. Realsalt is not heat treated.

I do most of my baking with SAF instant yeast. It's a professional baker's yeast that needs no proofing. Proofing is when you add the yeast directly to the water with a pinch of sugar to see if it's still alive. You can add the SAF yeast directly to the flour instead of proofing it in the liquid. Because it is a highly potent yeast, you use about 1/4 less of it than regular yeast.

As for baking pans, I use stoneware or glass baking pans. Stainless Steel pans are a wonderful choice, as well. Brushing the pan with olive oil works to keep the loaves falling right out of the pans. I do not use pan sprays because they have propellants and are not the best for the environment or for baking stones. Instead, make your own by adding 2 tsp to 2 cups olive oil. This will make your breads fall out of the pan everytime!

THINGS TO KEEP IN MIND WHEN USING AN ELECTRIC MIXER:

1. Be careful not to add too much flour! In the beginning this is very tempting and easy to do but in the end, you will wind up with a very heavy loaf.

2. Do not be tempted to over-knead. Because these machines are extremely powerful, it's very easy to over-knead the dough. If the dough goes from soft to stretchy to big globs that break apart in your hand, then you have most likely over-kneaded the dough. Usually anything over 10 minutes will do this. Be sure to perform the gluten test after about 5-7 minutes of kneading to prevent this from happening. (See below for proper gluten development information) Speed 1 on the Bosch™ Universal is sufficient for bread kneading.

If the dough feels heavy and just breaks apart and is not stretchy, then you must continue to knead a little longer. However, this can also happen if you have overkneaded the dough...it will go from soft and stretchy to heavy and sticky.

You will know this immediately if the dough goes from cleaning the sides of the electric mixer bowl to being very sticky on the sides of the bowl no matter how much more flour you add. Do not worry about over-kneading by hand, it would be very hard to do.

3. Usually Kneading on the lowest speed is sufficient for kneading bread. The higher speeds are most often reserved for using the blender or attachments.

CHECKING FOR PROPER GLUTEN DEVELOPMENT

Proper gluten development is important for a high-rising loaf of bread. It's formed when the protein part of the wheat is kneaded and it becomes stretchy and elongated. The carbon dioxide gas that is formed by the yeast is trapped in the gluten web thus causing the dough to rise. After kneading the dough into a soft and smooth consistency, it should feel rather "stretchy" but not "sticky." This will take anywhere from 3-10 minutes in an electric mixer to 10-20 minutes by hand.

Tuesday, April 24, 2007

Sneaky Smoothies...

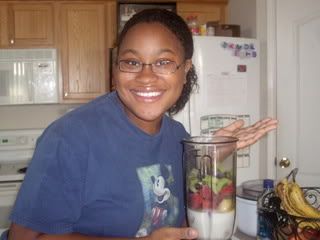
We drink smoothies for breakfast in our house every Tuesday morning and sometimes on the weekend. I taught Gracie to make them and now she prefers me not to be involved at all.

We have a standard recipe for the smoothies and they always end up tasting something like Strawberry Banana. However, I've recently realized that good smoothies are wonderful for hiding good foods that you want to get into your family.

Here is our basic recipe (all ingredients are approximate):

8oz of milk
8-10 frozen strawberries
3 bananas
2 T Flax Seed Oil
Wheat Germ
Honey to taste
Add ice to preferred consistency

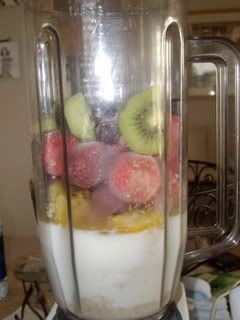
We've been known to sneak in some other items on occasion such as: Avocado, Spinach, Fish Oil, Kiwi, Blueberries, Dates (as a sweetener), Orange Juice (from freshly squeezed oranges), or plain yogurt.

This may seem weird and over the top to some I'm sure, but I assure you that it is a quick fix in the morning and the little people in our house LOVE these concoctions. We normally serve smoothies with some kind of bread or muffin. The kids don't know they aren't supposed to like spinach in a smoothie. If the color is a little "off", they never know (except for Chef Gracie) because their smoothies are served in cups w/tops and a straw (we save the cups that come with kid's meals at restaurants).

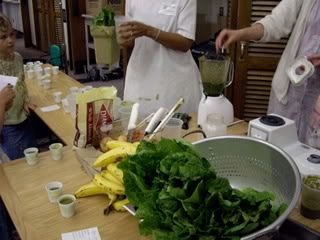
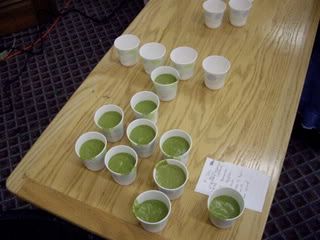
This weekend, I had the privilege of attending the Above Rubies Women's Retreat, a conference geared towards encouraging women in motherhood. A "Green Smoothie Demo" was provided for the two mornings of the retreat. I thought I was sneaky!

Here is the recipe for the smoothie I tested that I liked the best. It REALLY was good!

Enough water to cover the blades
Flax Seed (whole)
Almonds (whole and raw)
4-6 apples (whole w/skin & seeds, quartered)
2-4 bananas
1/2 head of lettuce
1/2 head of spinach


If all the variations are overwhelming...don't worry...start with something small the you know you will like. I've been making smoothies for probably four years. I started with a protein shake mix and a banana to make it sweeter. It's taken me awhile to experiment (I love routine and hate change). It's all about the journey right!?!?

Thursday, April 05, 2007

Below the Belt...

Ummm....let's just say that today I was hit below the belt on my no sugar thing. As I have said before the no sugar thing is mainly for refined sugars and "sweets", but I have been trying to eat healthy in general though. The idea has been to watch my carbs and eat lots of veggies and a bit of fruit.

Well today, my oldest daughter, who is becoming quite a whiz in the kitchen, hit me below the belt.


For crying out loud....NO FAIR~~~

These are our "Pumpkin Muffins". This is how we cook pumpkin bread when we are in a hurry and don't want to wait on the loaf to cook. Divide the batter into a muffin tin, and ~VOILA~... same tasty goodness in less than half the time.

Whenever these are cooked up, they whisper sweet nothings in my ear from across the room, gently whooing me in their direction. I've had two since this morning...so far...

As you can see, I'm not the only one enjoying these...or am I :)


Pray for me!

This recipe is from my Mom who is the ultimate whiz in the kitchen. We grew up eating tons of it at Christmas time and sharing tons of it with friends and family during the holiday season. Per my four year old''s request, these are officially no longer reserved for a certain time of year.

The now is to limit my snacking so that these muffins don't literally show up below the belt!

Friday, February 02, 2007

Super Simple Chicken Pot Pie

I originally received this recipe from a Super Suppers demo. I have since made it work for me.

Here are the ingredients:

About two chicken breasts - I have used the leftover meat from a whole chicken cooked in the crockpot, or, if this is a last minute dinner plan, I have stopped by the grocery store to pick up a fully-cooked deli chicken. If all else fails you can keep canned chicken in your pantry. One large size can will work great (12.5 oz) or if you want chunky chicken use two!

1 15-oz jar of Alfredo Sauce. I love Classico Roasted Garlic Alfredo.

1/2 cup frozen peas and carrots. I just add until it looks "right" and any veggies will do. This is a great way to use up leftover veggies.

2 T chopped pimentos. I never have these but I've been told a roasted red pepper would work too (Apparently red peppers can be roasted and then frozen)

Salt & pepper to taste

ADD THYME...I'm guessing ....maybe one tsp. This really adds a nice flavor.

1 package Pillsbury pie crusts. You can use a generic brand but I've tried a few and the Pillsbury always tastes better.

  1. Preheat the oven to 375.
  2. Stir together the chicken, pasta sauce, and veggies. Stir in seasonings.
  3. Line a pie pan with one piece of the pie dough. Fill with the chicken mixture. Top with remaining piece of pie dough and crimp the edges.
  4. Use a brush to apply an egg wash to the top of the pie. An egg wash is one egg mixed with about a tablespoon of water. You then take a brush and brush the wash (you won't use it all) over the top of your pie.
  5. Bake for 25 to 35 minutes or until crust is golden brown and pie is hot and bubbly
This is definitely a family favorite! It takes 10-15 minutes of prep time and 30 minutes of baking time. I've included some pictures of the prep below. We usually serve it with salad. I figure since it's not a LOWFAT recipe at least I can wash it down with some ruffage. Let me also say that as a family we are trying to eat less of stuff like this (hydrogenated fat in the crusts, and extra fat in the pasta sauce), but I'm not perfect and every now and then I need a "SAVE ME" dinner. Hope someone enjoys this!


Wednesday, January 17, 2007

Works-for-Me-Wednesdays: Making Lettuce Last

We are a part of an organic food coop. This allows us to get fresh fruit and veggies every other week. Usually we receive a couple of heads of lettuce in our bin.

I've learned that keeping lettuce dry is the trick to making it last. When I first started preparing my lettuce, I would wash it and then use a salad spinner to dry it. This did the trick but was a little labor intensive as all of the lettuce would not fit in the spinner. By accident, I figured out another way.

I washed my lettuce after cutting/tearing it by soaking it in a large bowl of cold water. I then placed the lettuce on a kitchen towel on my countertop. I got distracted and hours later came back to a bunch of DRY lettuce...no effort on my part. This has become my way of drying lettuce for salad.


Put in a plastic container or Ziploc bag with a paper towel to absorb excess moisture, lettuce will last a LONG time. The only thing to do is to check the paper towel every now and then to make sure it's dry. If not, replace it! I've had lettuce last up to 3-4 weeks!

Be sure to check out Rocks in My Dryer for more Works-for-Me Wednesday tips.

Thursday, November 30, 2006

Baking Bread

Today I baked bread. I started attempting to make bake bread soon after getting married as I thought this was one of the things I ought to be able to do. After a few years of making contact with people much more health/nutrition oriented than I, the transition has been made from attempting to bake a couple loaves of bread by hand on occasion to baking multiple loaves at a time on a regular basis. I am now a regular bread baker and I rarely buy bread from the store.

This is nothing less than amazing. I'm the same girl who rarely cooked a meal and constantly ate out. Now I bake my own bread....incredible.


I've always been a person driven to be the best at whatever I do. I thought that a wife and mother ought to know how to bake bread...just because. Now I bake bread because I'm convinced that it is the only way to make sure that I'm giving my family the best bread possible w/o paying an arm and a leg. Whole grain at the grocery store is really not whole grain. Once I understood how many foods, including bread, are stripped of their true nutritional value, I committed to doing what I could to give my family my best.


Not only do I bake my own bread but I mill my own flour. I know....REALLY insane! How'd I go from the up and coming financial research guru to breadbaker...I dunno...I guess it's Jesus.

I could try to explain the reason for milling my own flour but it's already been done so well HERE.


Anywho, I milled my fresh flour and produced five beautiful loves of bread in about 1.5 hour. Here's the bread going into the oven....


Here's the finished bread on the counter to cool with fresh melted butter brushed over the top...Mmmmmmmm!!!


I went on to slice the bread with an electric slicer. A good friend just gave me this tip. This was my first time to use the electric slicer and it was wonderful!


Not bad. I also took some additional dough (the dough that is normally the sixth loaf) and made a gigantic "Hot Pocket". It was so good. A little cheese, turkey, and miracle whip inside before baking followed by melted butter and parmesan cheese on the outside after baking and VOILA!


I started about 4pm and was finished at 6pm. This included cleanup...and....one hour of this time was spent looking at magazine while my bread was rising and baking! Not bad :)


We ate a loaf. I put one in the refrigerator for later (cuz we almost go through a whole loaf when the bread is fresh and hot...wonderful with butter and fruit spread). I also put two in the freezer and sent one home with my mother-in-law. I will bake again in a couple of weeks. Many times I give most of it away b/c when I get in a groove of baking every week we just can't eat it all. Not a bad problem to have :)

Monday, November 27, 2006

Nonny's Famous Pumpkin Bread

I have wonderful memories of my mother's cooking wafting into my room in the wee hours of the morning. She's be up very late and very early making sure that holiday memories were made. This is an Evans family favorite and I've finally learned from my Mom the art of making this tasty bread and recreating this beautiful aroma and memory in my home and for my family.

This pumpkin bread has already made two appearances at our house this past week. Once as muffins for breakfast and once as loaves to share at Thanksgiving. I love the sound of my littles asking for "Punkin Bed" :)

2 cups Pumpkin (1 15oz can will do)

1 cup oil (I have been using vegetable)

3 cups of sugar (gotta find a substitute)

4 eggs

3 1/4 c flour (I have substituted freshly ground wheat for white and it works wonderfully)

1 tsp baking powder

1 tsp baking soda

1 tsp clove powder

1 tsp nutmeg

2 tsp salt

1 tsp cinnamon

Stir dry ingredients together. Then, mix pumpkin, oil, sugar, and beaten eggs in another bowl. Add wet to dry and stir. This will make about 2 dozen muffins or 2 loaves.

Bake at 350 for 20 minutes for muffins and 45 minutes for loaves. I think that it really takes more time than this but this is what I set my timer for before I start sticking the bread with a toothpick checking for doneness. One of these days I'll figure out exactly how long this takes in my oven :)

Friday, November 17, 2006

Shake-N-Bake Chicken

Tonight I cooked Shake-N-Bake Chicken with corn on the cob and lima beans. This is a family favorite. I defrosted some chicken breasts in a bowl of warm water. I just kept filling the bowl with warm water until dumping it each time it would get cold. Defrosting took about an hour. then I cut up the chicken breasts into nugget-sized chunks before dumping them in the brown paper bag holding two cups of mix.

I LOVE the site where this recipe comes from Hillybilly Housewife. This lady has AWESOME recipes as well as wonderful tips and tricks for the kitchen. In addition, many of her recipes are budget friendly.

I follow Maggie's recipe almost exactly...I add Season All for the poultry seasoning.Once you make this mix, it keeps forever and you can actually use it for chicken, pork, fish, etc. So flexible, so quick, and BETTER than store bought!

Wednesday, November 01, 2006

Cream Cheese Chicken

Ingredients:


4-6 boneless, skinless chicken breasts

1/4 cup melted butter or margarine

Salt & pepper, to taste

2 packets dry Ranch or Italian Dressing Mix

1 can cream of chicken soup

8 ounces cream cheese, cut into cubes

1/2 c chicken broth

1/2 chopped onion


Directions:


Brush chicken with butter and sprinkle with salt and pepper. Place in a CrockPot and sprinkle 1 packet dry mix over all. Cover and cook on low for 6 to 7 hours. About 45 minutes before done, brown onion in 1/4 cup of juices from CrockPot. Add soup, second packet of dry dressing mix, cream cheese and chicken broth. Cook until smooth. Pour over the chicken and cover and cook another 45 minutes. Serve with sauce.


I serve with rice, pasta, or mashed potatoes. You can add in broccoli or other veggies for variety.